This integration deployment guide will help you quickly and seamlessly connect Cornerstone Recruiting with HighMatch.
Prerequisites: Cornerstone Recruiting with Edge API and the Cornerstone Assessment Connector
Note: Only one assessment provider can be integrated in your Cornerstone portal using the Edge connector.
Summary of the Integration Flow
- The integration is triggered manually by a recruiter or hiring manager, or during the application process.
- The candidate will complete the assessment via the invitation email they received, which will be sent when a candidate is moved into the assessment step by a recruiter or hiring manager.
- HighMatch will update the assessment status in Cornerstone when the assessment is in progress, completed, or an error occurs.
- When the candidate has completed the assessment, HighMatch will post the results and a link to a detailed HighMatch assessment report on the candidate’s profile.
Summary of Steps
There are 7 steps to configure the integration before you can request and receive back candidate assessment results from within Cornerstone.
Steps 1-5 cover how to enable the integration.
Step 1: Receiving Credentials from HighMatch
Step 2: Connect the Assessment Connector
Step 3: Configure Settings
Step 4: Integration Fields Configuration
Step 5: Configuring Assessment Assigning Methods
Steps 6-7 cover how to use the integration.
Step 6: Assigning Assessment to Applicants
Step 7: Viewing Applicants’ Assessment Results
Please reach out to HighMatch’s Success team at support@highmatch.com if you wish to enable the integration to connect Cornerstone with HighMatch, or if you have any questions regarding the HighMatch integration, assessments, and assessment reports.
Process Details
Step 1: Receiving Credentials from HighMatch
Once this integration setup has been approved, HighMatch will reach out to let you know we are ready to enable the integration.
This email will direct you on the steps to take to connect the integration, as well as provide you with some assessment information and the following credentials that Cornerstone requires:
- Tavio Username
- Tavio Password
- Tavio Webhook URL
Step 2: Connect the Assessment Connector
Once you receive these credentials, it’s time to connect and configure the Assessment Connector. Start by:
- Logging in to your Cornerstone portal.
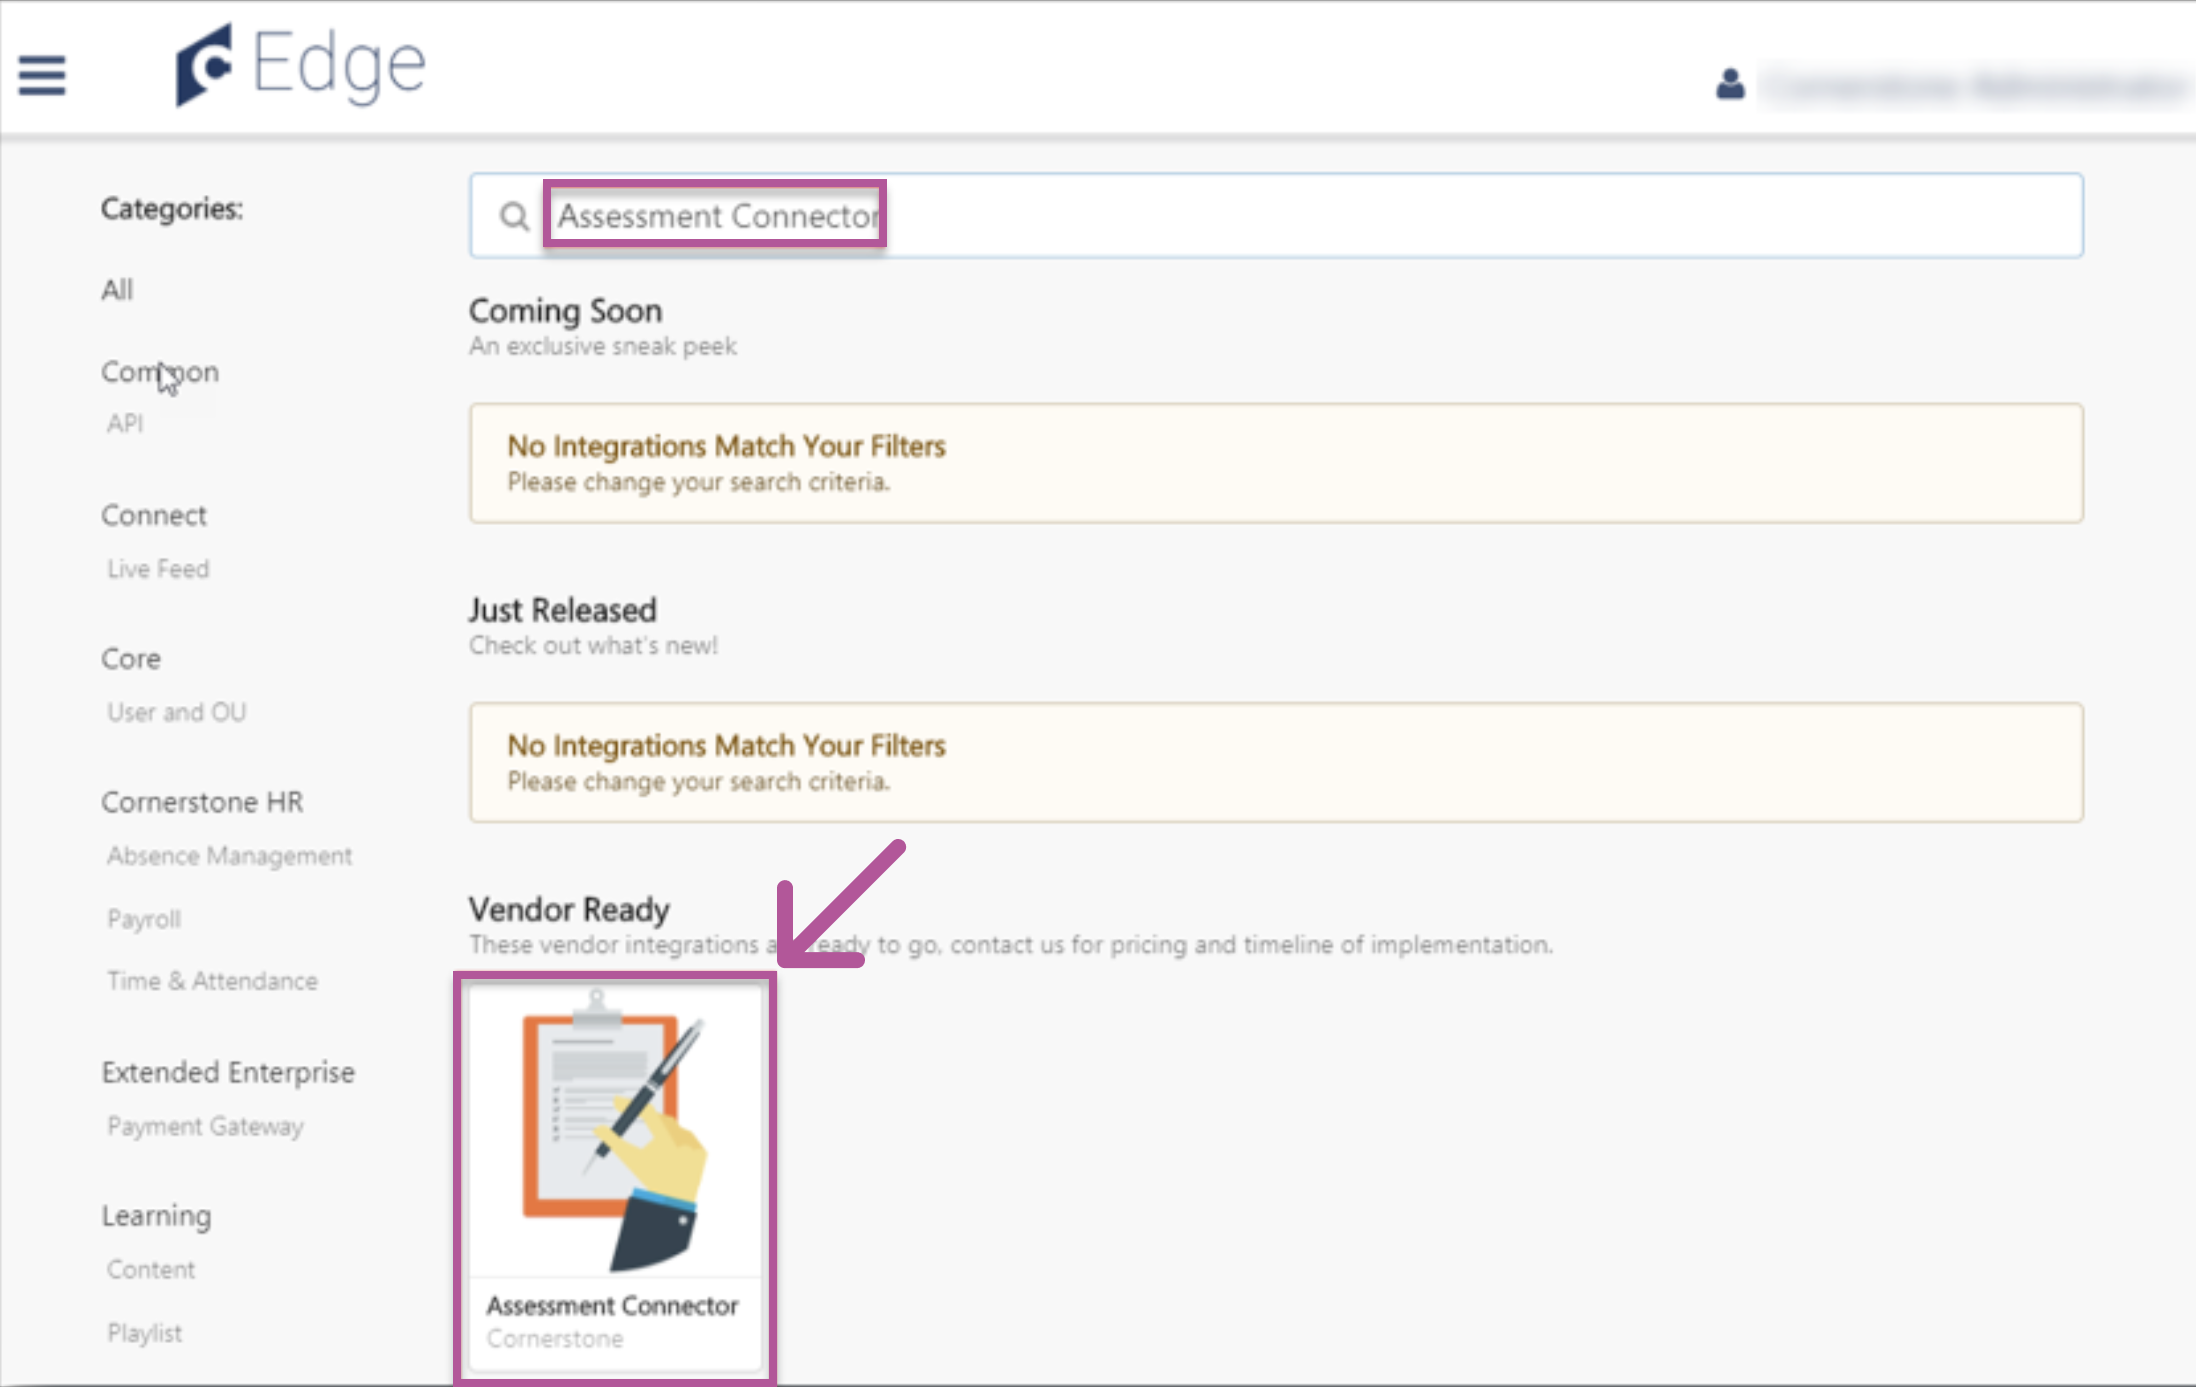
- Click Admin > Tools > Edge > Marketplace.
- Search for the Assessment Connector, then click on the Assessment Connector tile.
- Click Create Connection.
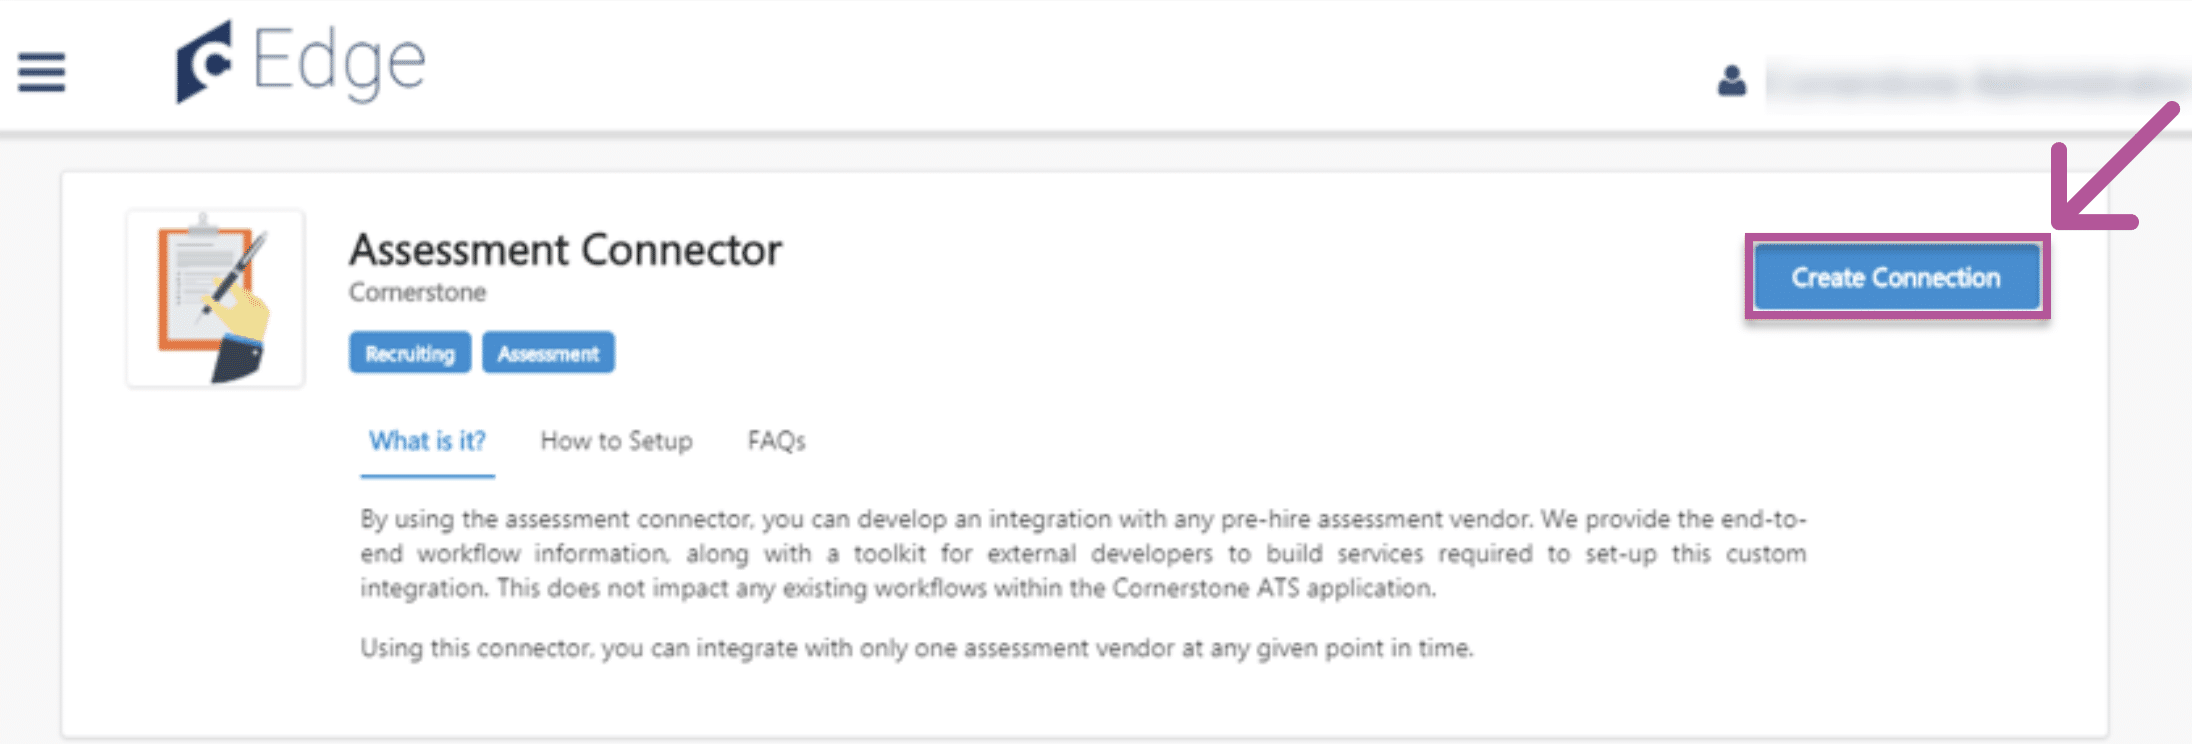
- Enter the Assessment information we sent you in Step 1, then click Submit.
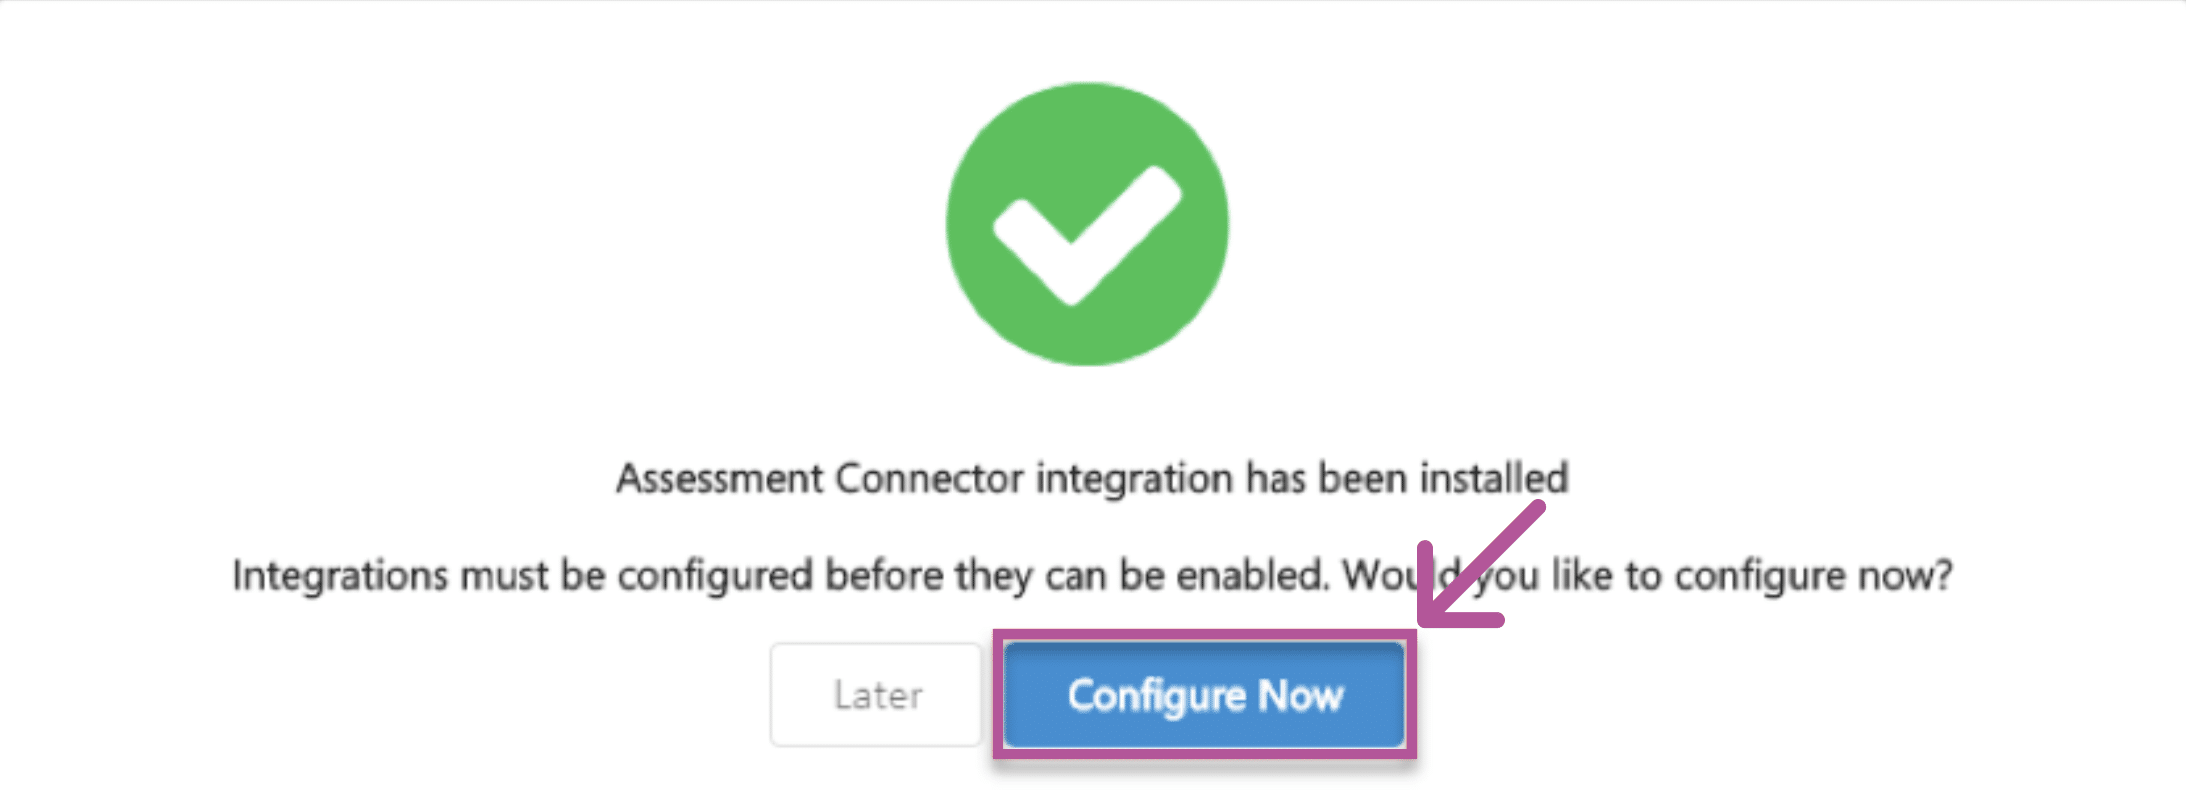
- Click on Configure Now on the success screen, and you will be directed to the Settings page.
- Copy the Callback Access Key value by clicking on the Copy button.
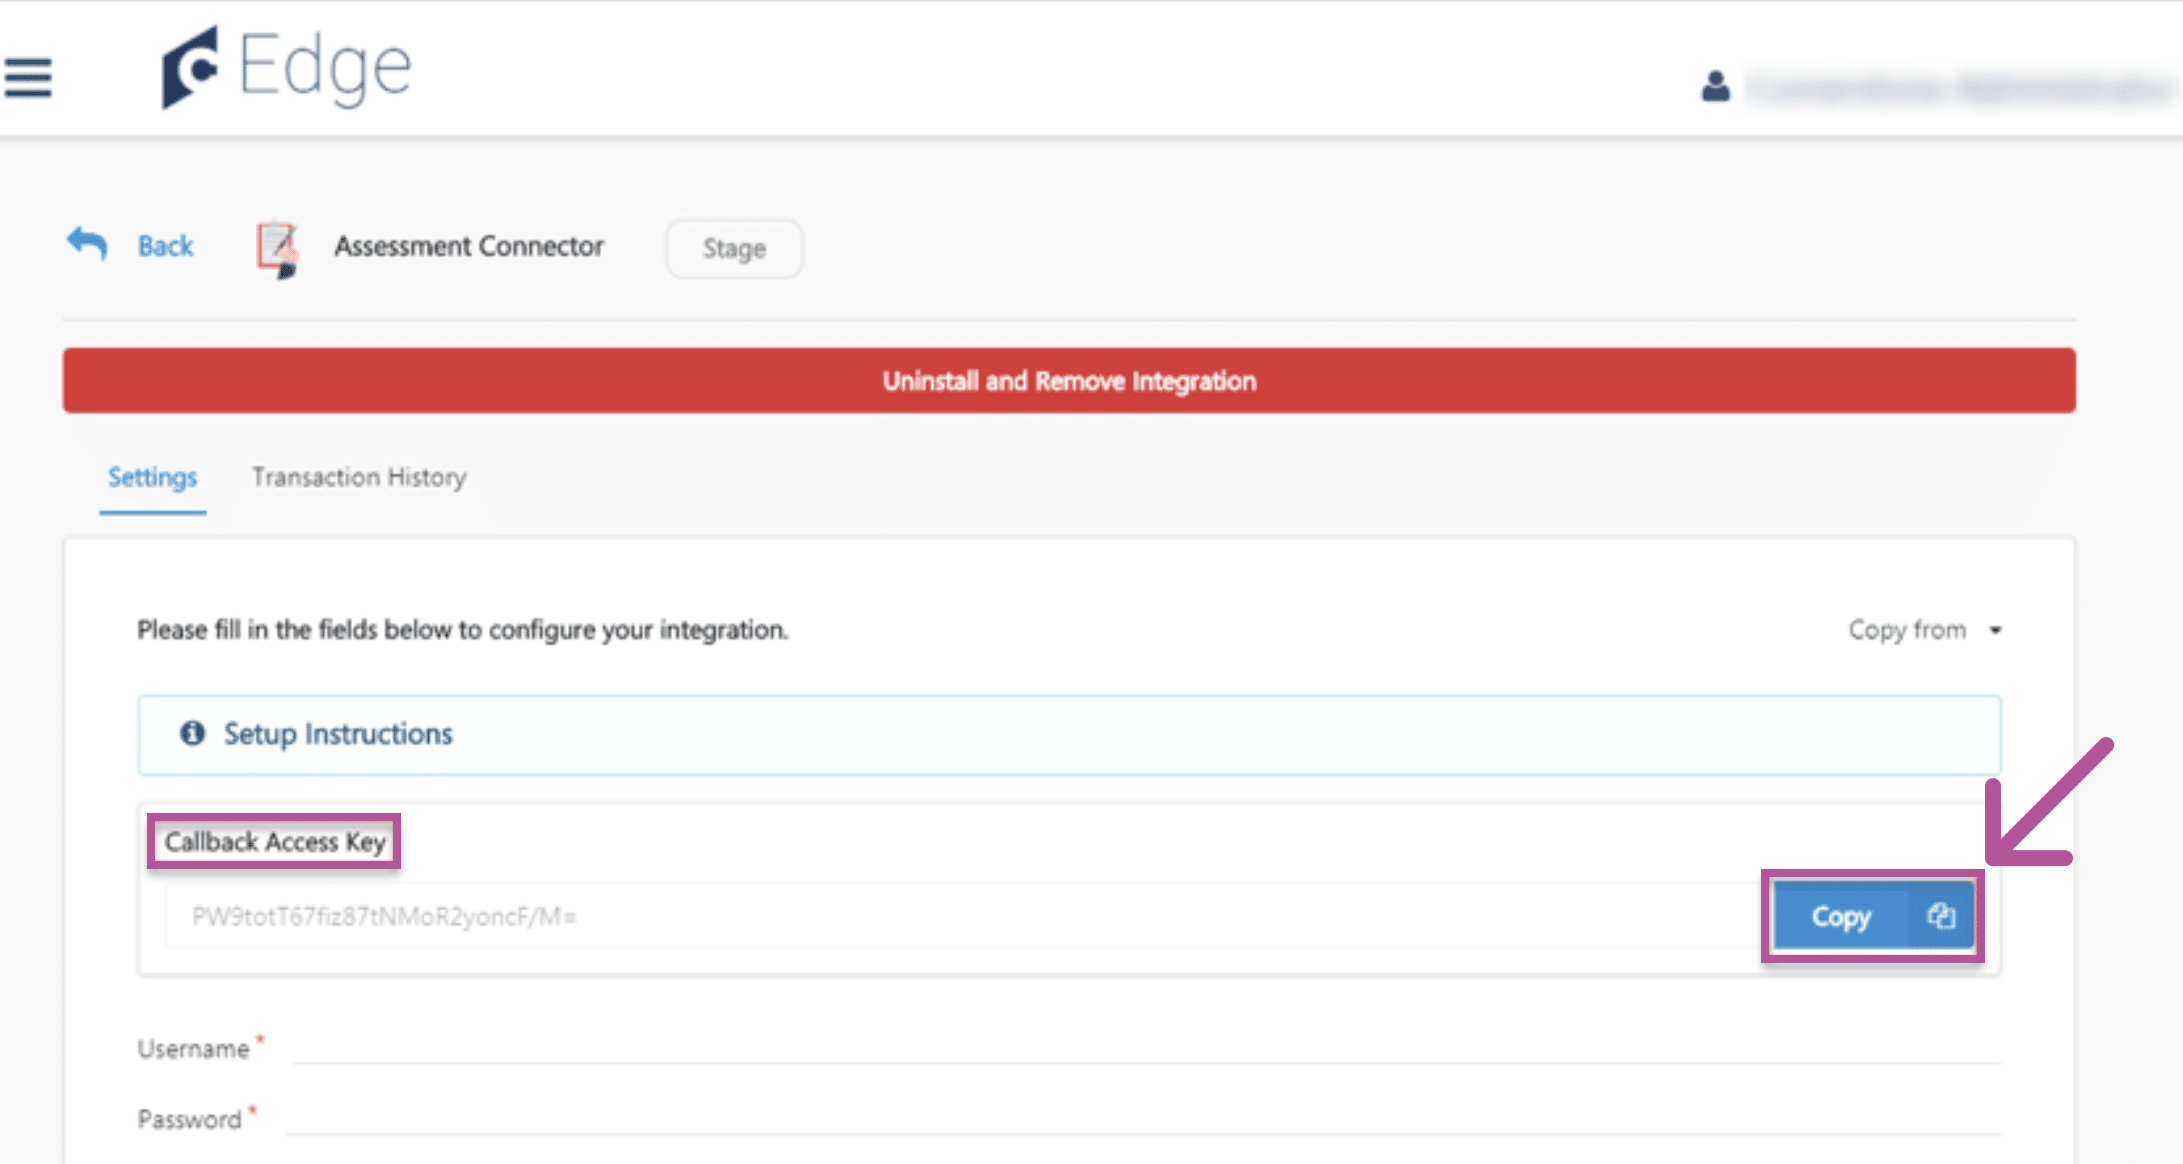
- Provide the Callback Access Key to HighMatch.
- This key will be required to establish a connection when sending assessment status/updates back to Cornerstone.
Step 3: Configure Settings
Now that the Assessment Connector has been connected and the Callback Key has been sent to HighMatch, please enter the additional credentials that were provided in Step 1:
- Username: The username provided in Step 1 to authenticate the request from Cornerstone Recruiting to HighMatch.
- Password: The password provided in Step 1 to authenticate the request from Cornerstone Recruiting to HighMatch.
- Base Service URL: The base URL endpoint for all assessment webhooks provided in Step 1.
Step 4: Integration Fields Configuration
This is the list of available fields that Cornerstone may send to HighMatch when an assessment request is assigned to an applicant.
- Select the fields by turning on the toggle switch.
- Package ID
- Recruiter Email
- Applicant First Name
- Applicant Last Name
- Applicant Email
- Callback URL
- Applicant Reference User ID
- Application Reference Order ID
- Click on Save Settings, which will take you to the Manage Integrations page.
- Search for Assessment Connector integration, then enable it by toggling the switch.
Step 5: Configuring Assessment Assigning Methods
There are two methods for assigning applicants an assessment:
- Application Workflow: Applicants can launch the assessment when completing the application.
- Manage Applicants: Applicants can be assigned to an assessment ad hoc through the Assign Integration action item on the Manage Applicants page.
Application Workflow Method
To assign the assessment to applicants during the application process, add it to a step in the Application Workflow.
Access Application Workflow:
- To access the Application Workflow Templates, go to Admin > Tools > Recruit. Then, click the Applicant Workflow Templates link in the Applicant Tracking section.
- To access Default Requisition Templates, go to Admin > Tools > Recruit. Then click the Default Requisition Templates link in the Applicant Tracking section.
- To manage job requisitions, go to Recruit > Manage Requisition.
- To access Requisition Templates, go to Admin > Tools > Recruit. Then, click the Requisition Templates link in the Applicant Tracking section.
Add Assessment(s) to the Application Workflow:
- Click the Add Section icon to add a section to the application workflow that will include the assessment integration. Name the section in the Add Section pop-up.
- Note: You can also add the assessment integration to an existing section.
- Within the section, add the Add Action Item dropdown, then select Custom Integration. This opens the Edit Action Item pop-up.
- Complete the following fields in the pop-up:
- Title: Enter a descriptive value in the Title field. This is a required field with a 50-character limit.
- Instructions: Enter instructions for the action item. This field is optional and accepts HTML and does not have a character limit.
- Integration: Select Custom Assessment. This displays a new dropdown that lets you select the assessment.
- Save the page.
- Create a new job requisition to include the custom application workflow.
Manage Applicant Method
When assigning an assessment to an applicant outside of an application workflow, create a new Applicant Status.
Emails are triggered when a user is assigned the assessment outside of the application workflow (i.e., through the Manage Applicant page).
Note: The Assign Integration Assessment email trigger will need to be configured for the applicant to receive an email:
- Action: Assign Integration Assessment.
- Description/Trigger: This email is triggered when a user is assigned an assessment outside of the application workflow. The email can be sent to the External Applicant, Hiring Manager, Internal Applicant, OU Approver, and Requisition Owner. This email can be configured as a Notification or Reminder type email. This email is active by default and can be found in the Recruitment action type section of Email Management.
- Email Tags: The APPLICANT.INTEGRATION.ASSESSMENT.LINK tag must be included in the email. This tag provides a link that the applicant can click to access the assessment.
Access Application Workflow:
- Navigate to Applicant Statuses by clicking Admin > Tools > Recruit.
- Click on the Create Custom Status link. This opens the Create Custom Status pop-up.
- Complete the fields in the pop-up:
- Language: To localize the status name and description into other available languages, select the appropriate language from the dropdown list and enter the localized name and description in the appropriate fields.
- Display Name: The status name that appears throughout the system. There is a 50 character limit for this field.
- Description: Describe the purpose of the status and what is implied when an applicant is in that status. There is a 500 character limit for this field. This is not a required field.
- Type: Select Custom Integration from the dropdown.
- Note: This field is displayed only when creating a custom status at the top-level OU. When creating a custom status for a child OU, the Type field displays the type selected for the parent OU but is not editable.
- Integration: Select Custom Assessment from the dropdown.
- Active: Ensure the field is checked before saving the status to keep the status active in the portal.
- To access Requisition Templates, go to Admin > Tools > Recruit. Then, click the Requisition Templates link in the Applicant Tracking section.
Now your setup is complete and it is now time to schedule a meeting with your HighMatch Success Manager to being integration testing. We will help guide you through Steps 6-7 during your meeting.
Step 6: Assigning Assessments to Applicants
There are two methods for assigning applicants an assessment:
- Application Workflow: Applicants can launch the assessment when completing the application.
- Manage Applicants: Applicants can be assigned to an assessment ad hoc through the Assign Integration action item on the Manage Applicants page.
Using the Application Workflow Method:
When applying for a position, applicants can launch the assessment when completing their application.
Using the Manage Applicant Method:
To assign an assessment from the Manage Applicant page:
- Navigate to the Manage Applicants page.
- Select the applicant(s) and change their applicant status to the previously created custom applicant status associated with the assessment integration.
- While the same applicant(s) are selected, select the Assign Integration Assessment option from the Actions dropdown. This opens the Assign Integration Assessment pop-up.
- Under the Assessment column on the Assign Integration Assessment pop-up, select the assessment you want to assign to the applicant.
- Click Submit.
Applicants will receive an email notification that includes an assessment link. The applicant can launch the assessment by clicking on this link.
Step 7: Viewing the Applicants’ Assessment Results
Once the applicant has completed the assessment, you can review the results in Cornerstone. When viewing an applicant’s results, you can see the following:
- Assigned: The date when the assessment request is assigned to the applicant.
- Reference ID: An auto-generated Cornerstone unique identifier.
- Status: Status of the assessment; possible values are “Completed,” “In Progress,” “Cancelled,” and “Unknown.”
- Assessment Package Name: Name of assessment package assigned to the applicant.
- Provider Reference ID: HighMatch’s unique identifier for each screening request.
- Result: Additional details of the applicant’s assessment results.
- View Report: A Link that will direct the recruiter/hiring manager to HighMatch’s assessment report for a more detailed view of the applicant’s Assessment results.
Your integration is set up and ready to use! Please reach out to HighMatch’s Success team at support@highmatch.com if you have any questions or feedback regarding the HighMatch integration, assessments and assessment reports.