This integration deployment guide will help you quickly and seamlessly connect Greenhouse Recruiting with HighMatch.
Summary of the Integration Flow
- The integration looks for candidates in Greenhouse Recruiting who have been moved to the HighMatch stage and sends the assessment invitation to the candidate.
- HighMatch will display the assessment status in Greenhouse Recruiting.
- HighMatch will update the Greenhouse Recruiting HighMatch stage on the candidate profile if the link was successfully sent to the candidate or if it failed to send.
- When the candidate has completed the assessment, HighMatch will post the assessment score and link to the assessment report on the candidate’s profile.
Summary of Steps
There are 8 steps to configure the integration before you can request and receive back candidate assessment results from within Greenhouse Recruiting.
Steps 1-5 covers how to enable the integration.
Step 1: Reach out to Greenhouse Recruiting Support Team
Step 2: Build or Identify a Test Candidate and a Test Job
Step 3: Receiving Credentials from Greenhouse
Step 4: Specify the Stage for HighMatch assessments in your Hiring Pipeline
Step 5: Create or Identify a User for the integration
Steps 6-8 covers how to use the integration.
Step 6: Add an Assessment to a Job
Step 7: Manually Send an Assessment
Step 8: View the Candidate’s Assessment Report
Process Details
Step 1: Reach out to Greenhouse Recruiting’s Partner Support Team
Once this integration setup has been approved, HighMatch will reach out to you to let you know we are ready to enable integration and provide you with an API key.
This email will direct you to reach out to Greenhouse Recruiting’s partner support team at partner-support@greenhouse.io to ask them to “enable the HighMatch assessment production stage” and to give them your API key provided to you by HighMatch.
You may continue onto Step 2 while waiting for confirmation from Greenhouse partner support.
Step 2: Build or Identify a Test Candidate and a Test Job
To prepare for testing, you will need to create a test candidate (or identify an existing test candidate) as well as create a test job (or identify an existing test job) in your Greenhouse account.
Performing this step will prepare you for Steps 6-8.
Note: You will need to add an email address to the test candidate that you have access to, and should indicate clearly that this is a test record. You may choose to delete any test records after you have completed testing if you wish.
Step 3: Receiving Confirmation from Greenhouse
Once the Greenhouse partner support has reached out to let you know that the HighMatch assessment production stage has been enabled using your API key, please let your HighMatch contact know.
Once we receive your response, HighMatch will work behind the scenes to enable the integration in our systems in order for the integration to sync properly with Greenhouse. We will then reach out to let you know once this process is complete. Please move on to the next step once you’ve received confirmation for HighMatch.
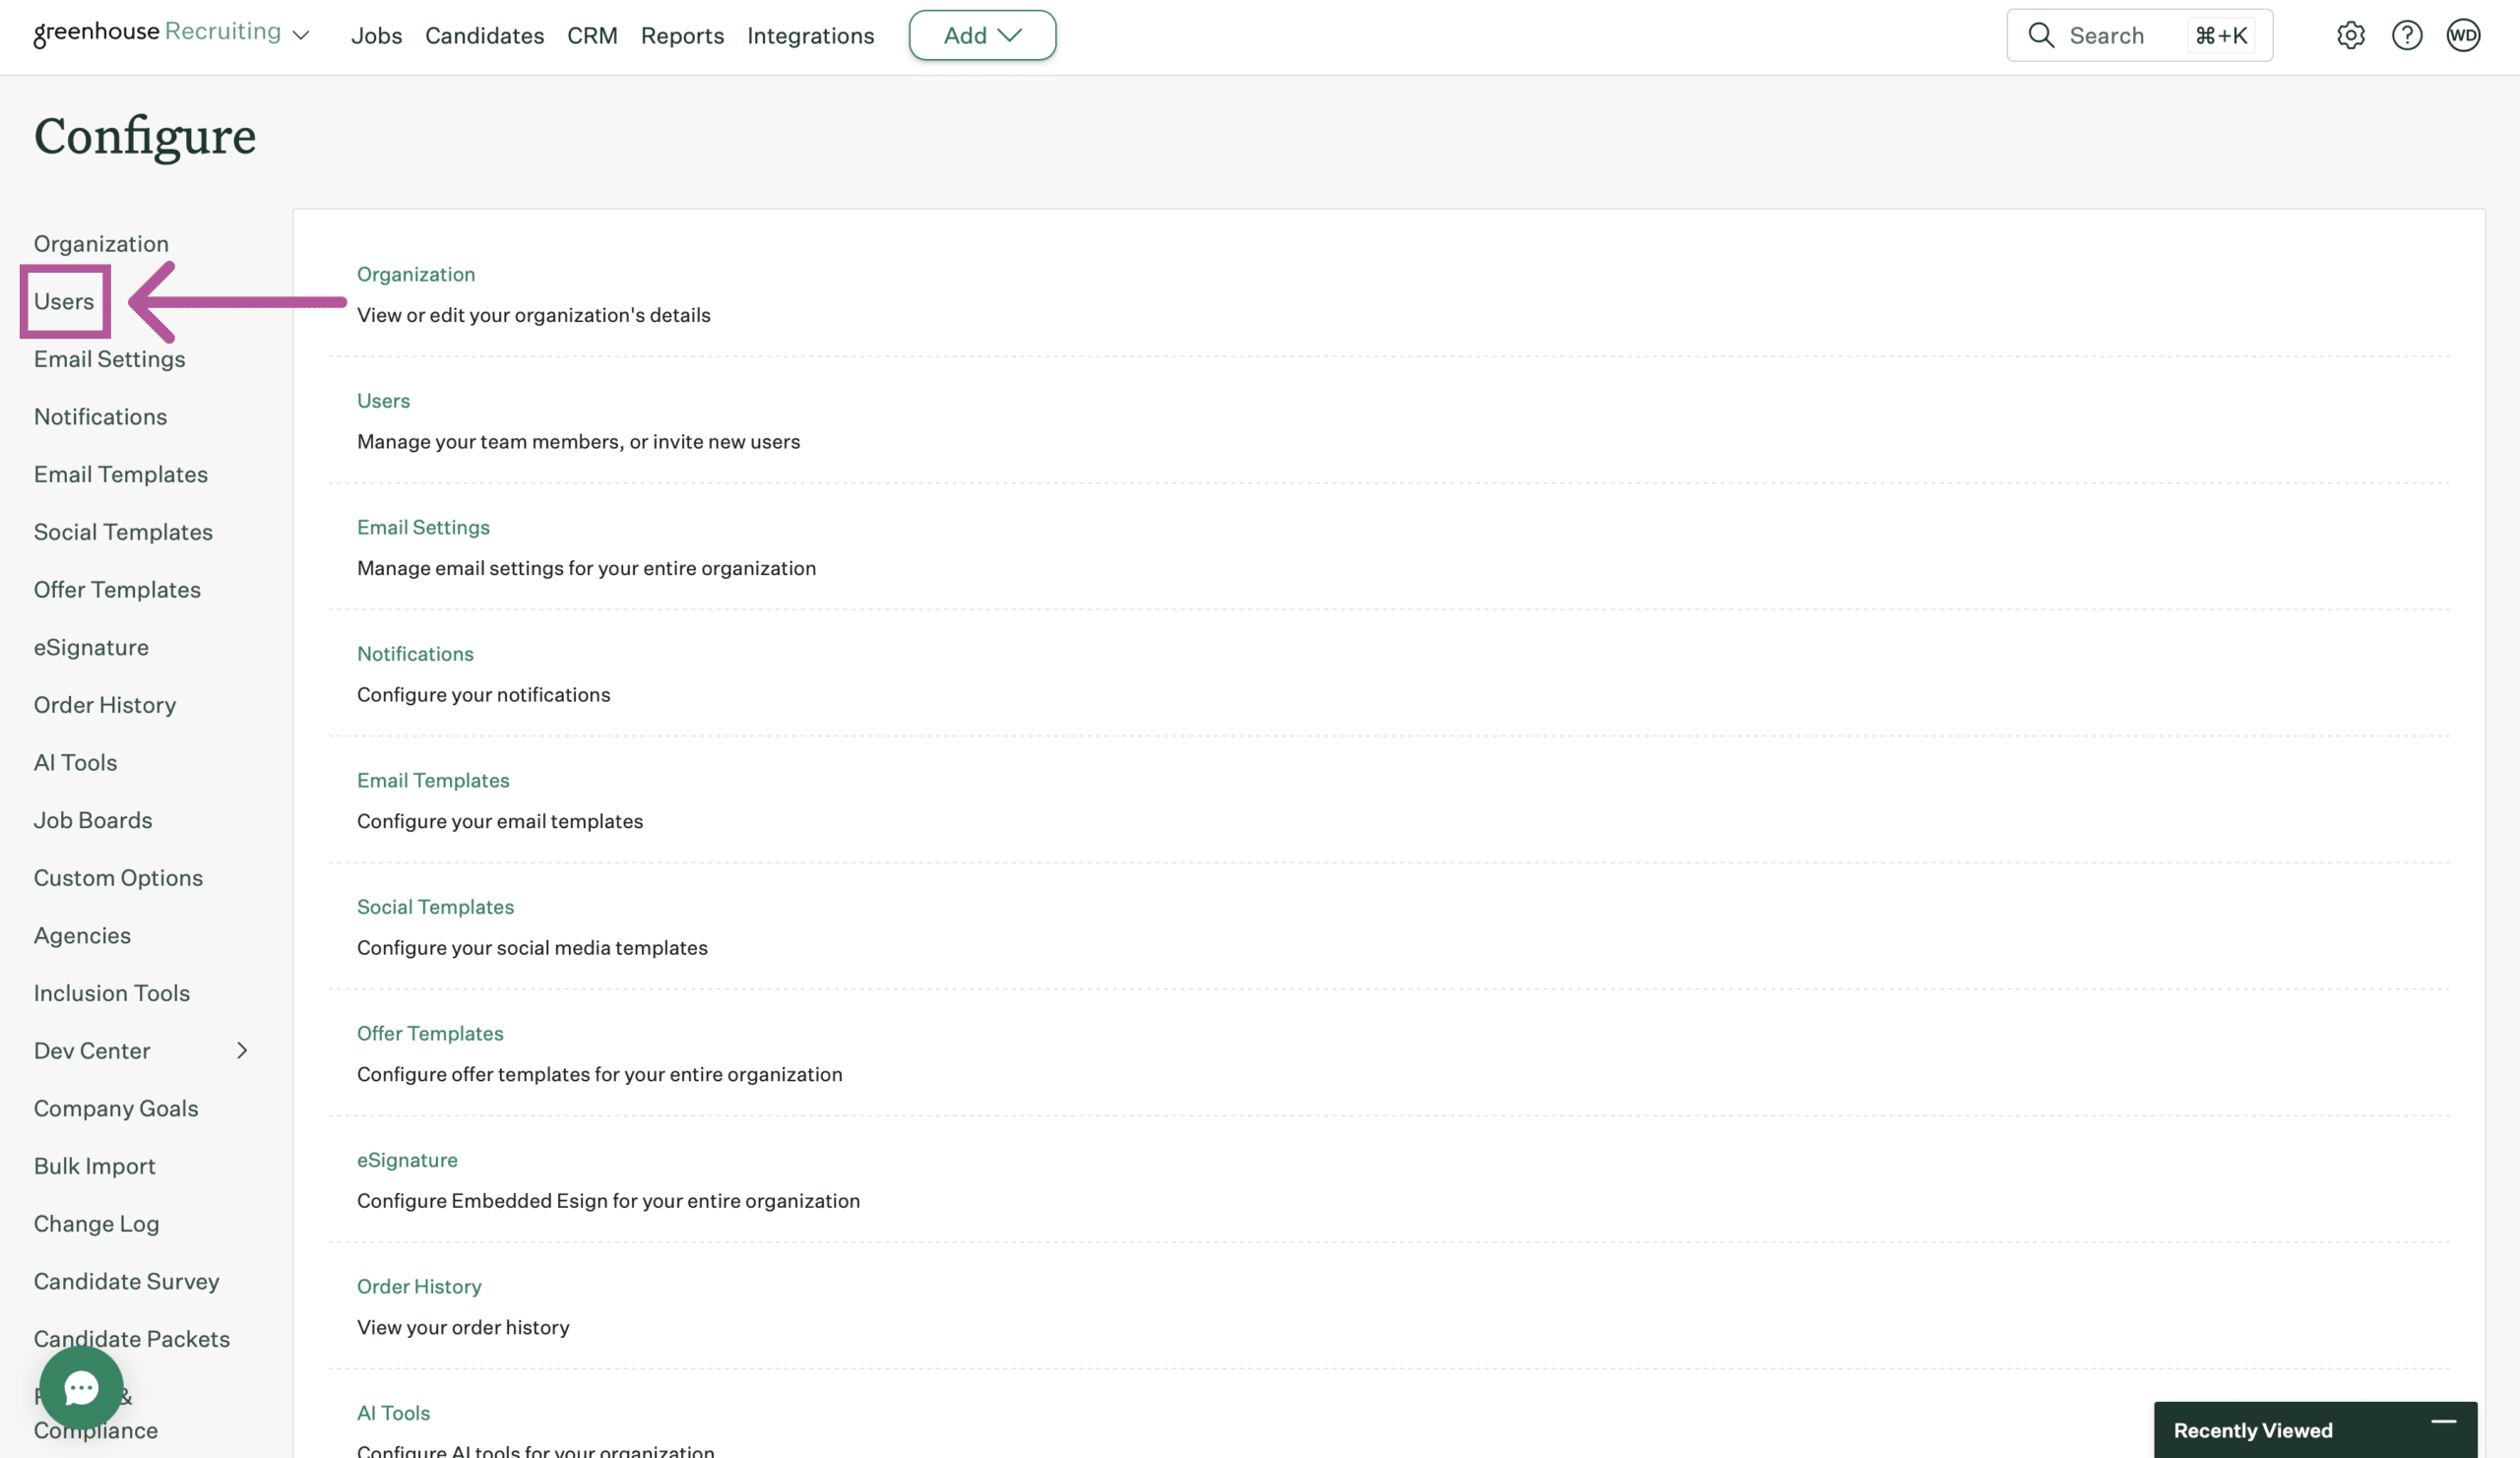
Step 4: Create and Assign a User for the Integration
The integration requires a user to be specified for grading (for viewing assessment reports). If an existing user already has the required permission, you can skip this step.
- Go to Configure > Users > click + New Users.

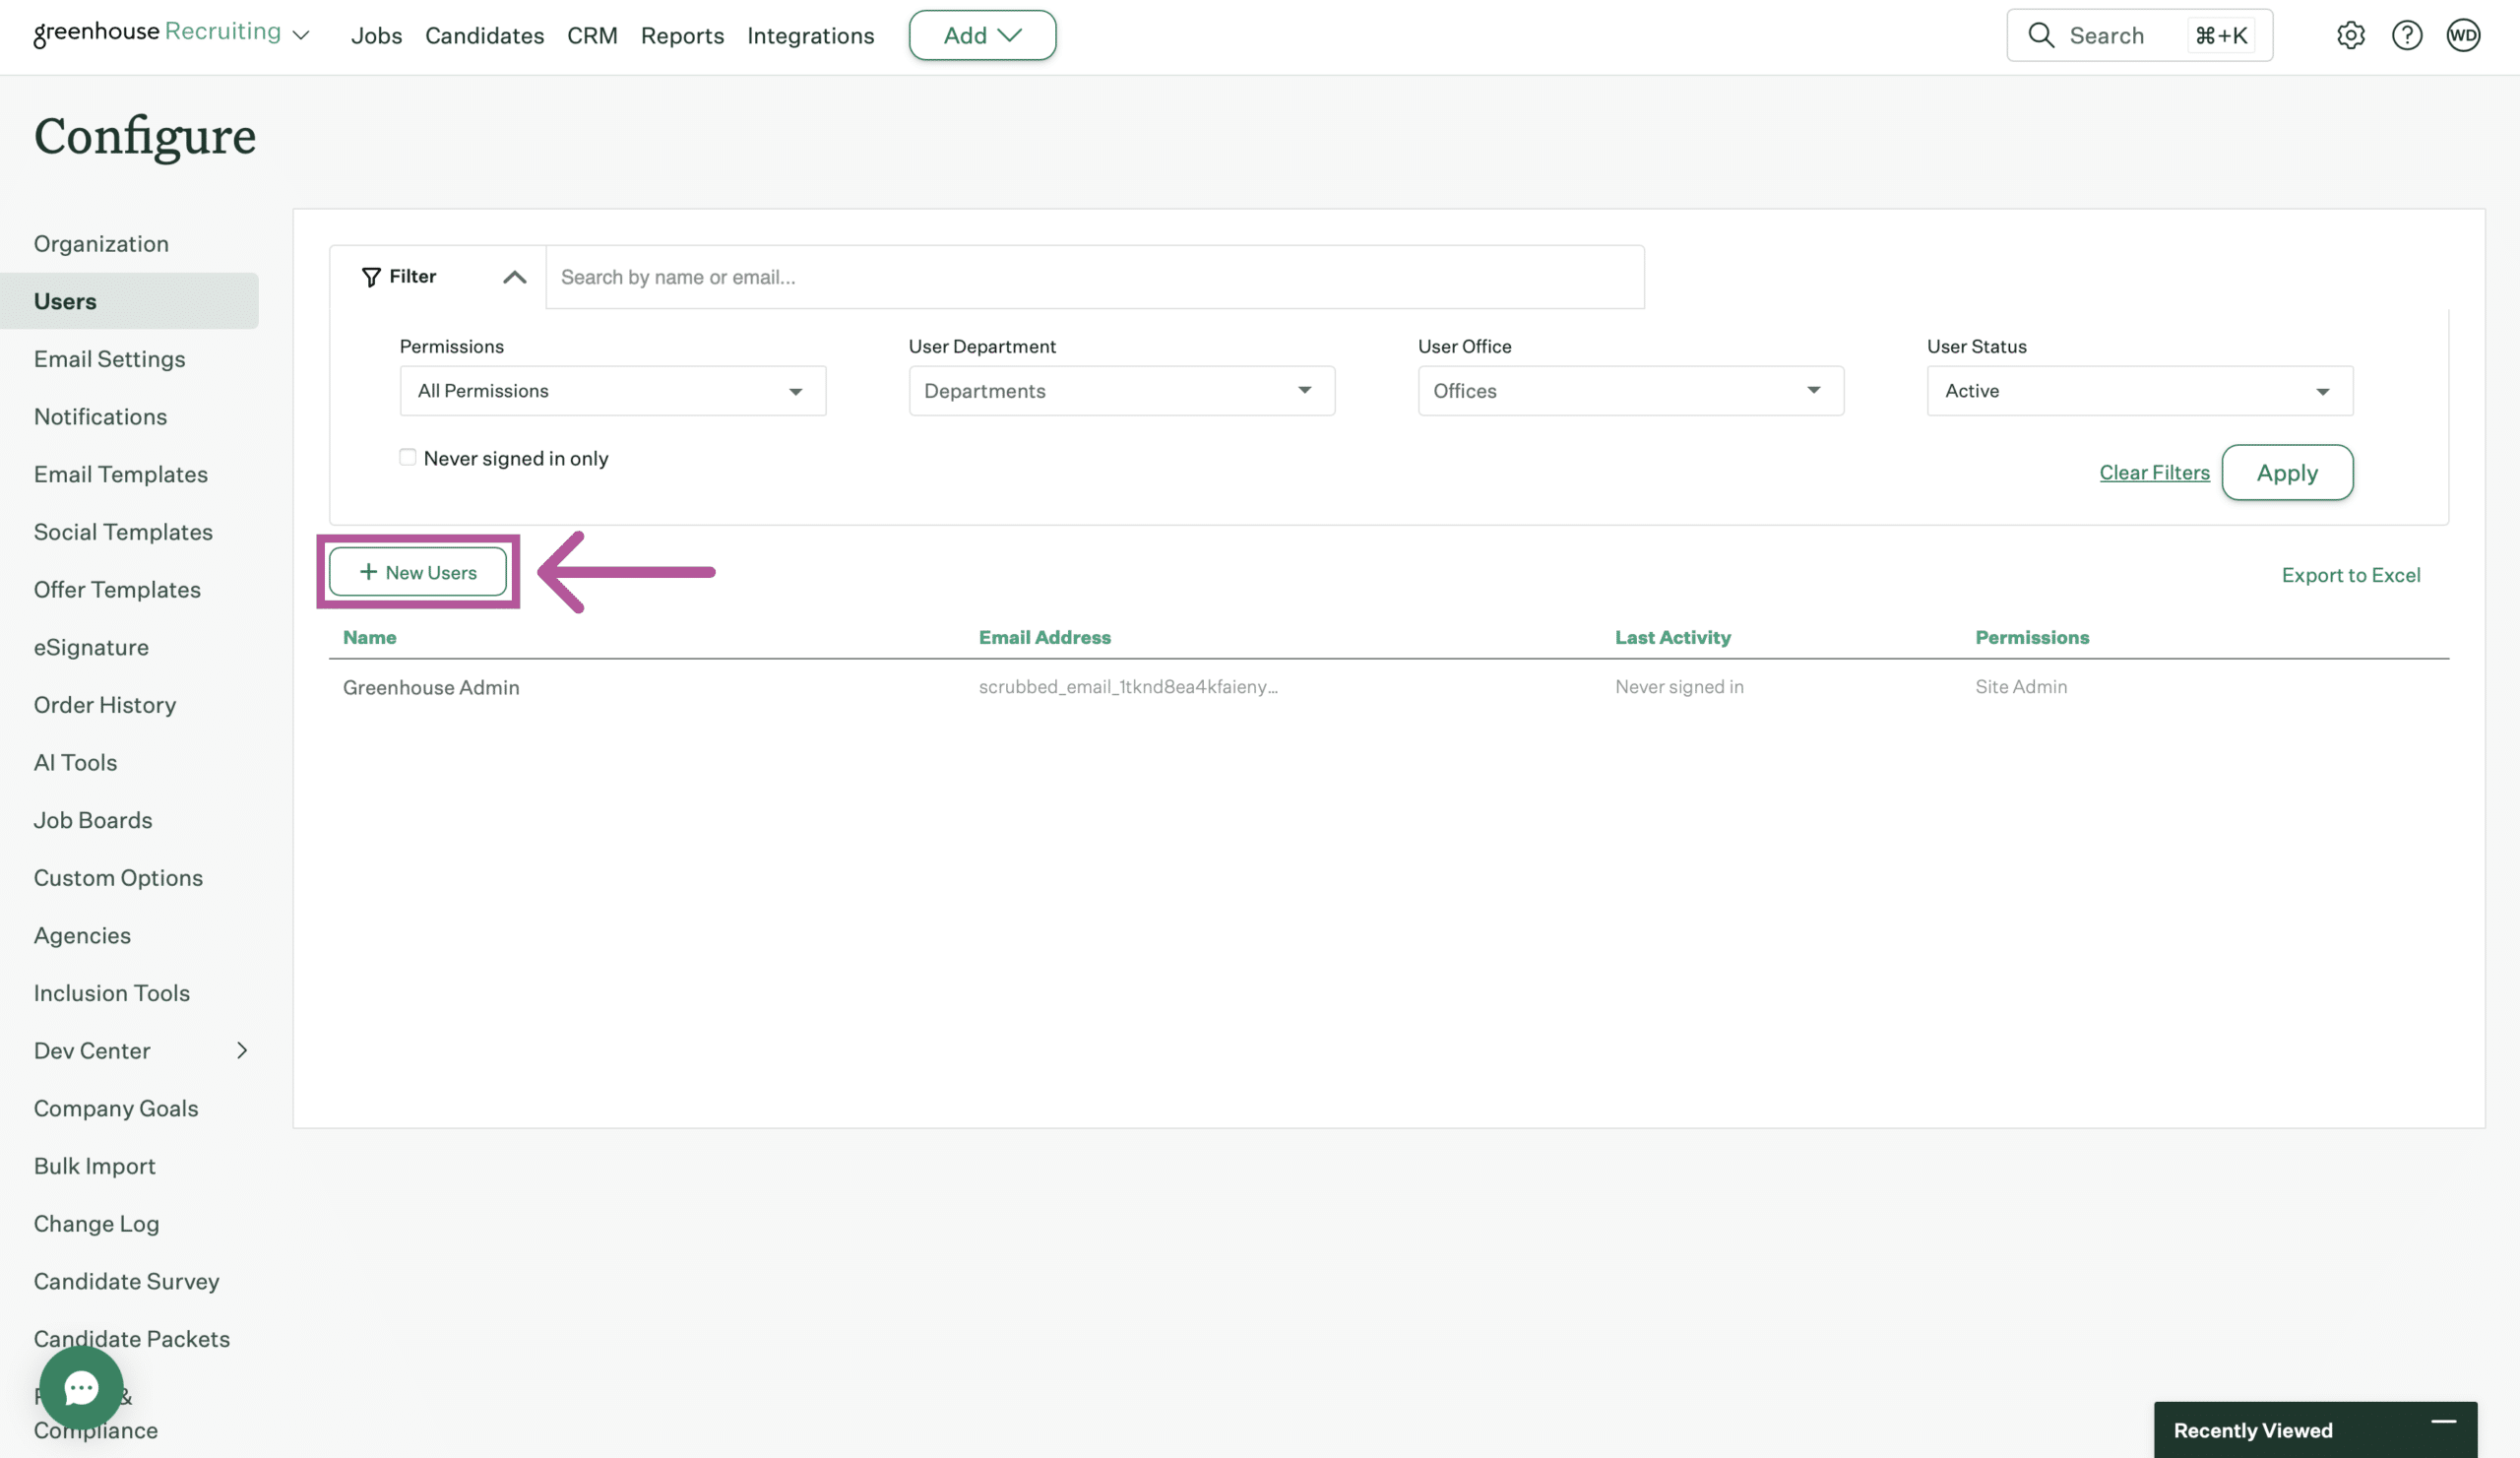
- Enter the user’s email and set the user’s permission. Click the Save button when you are done.
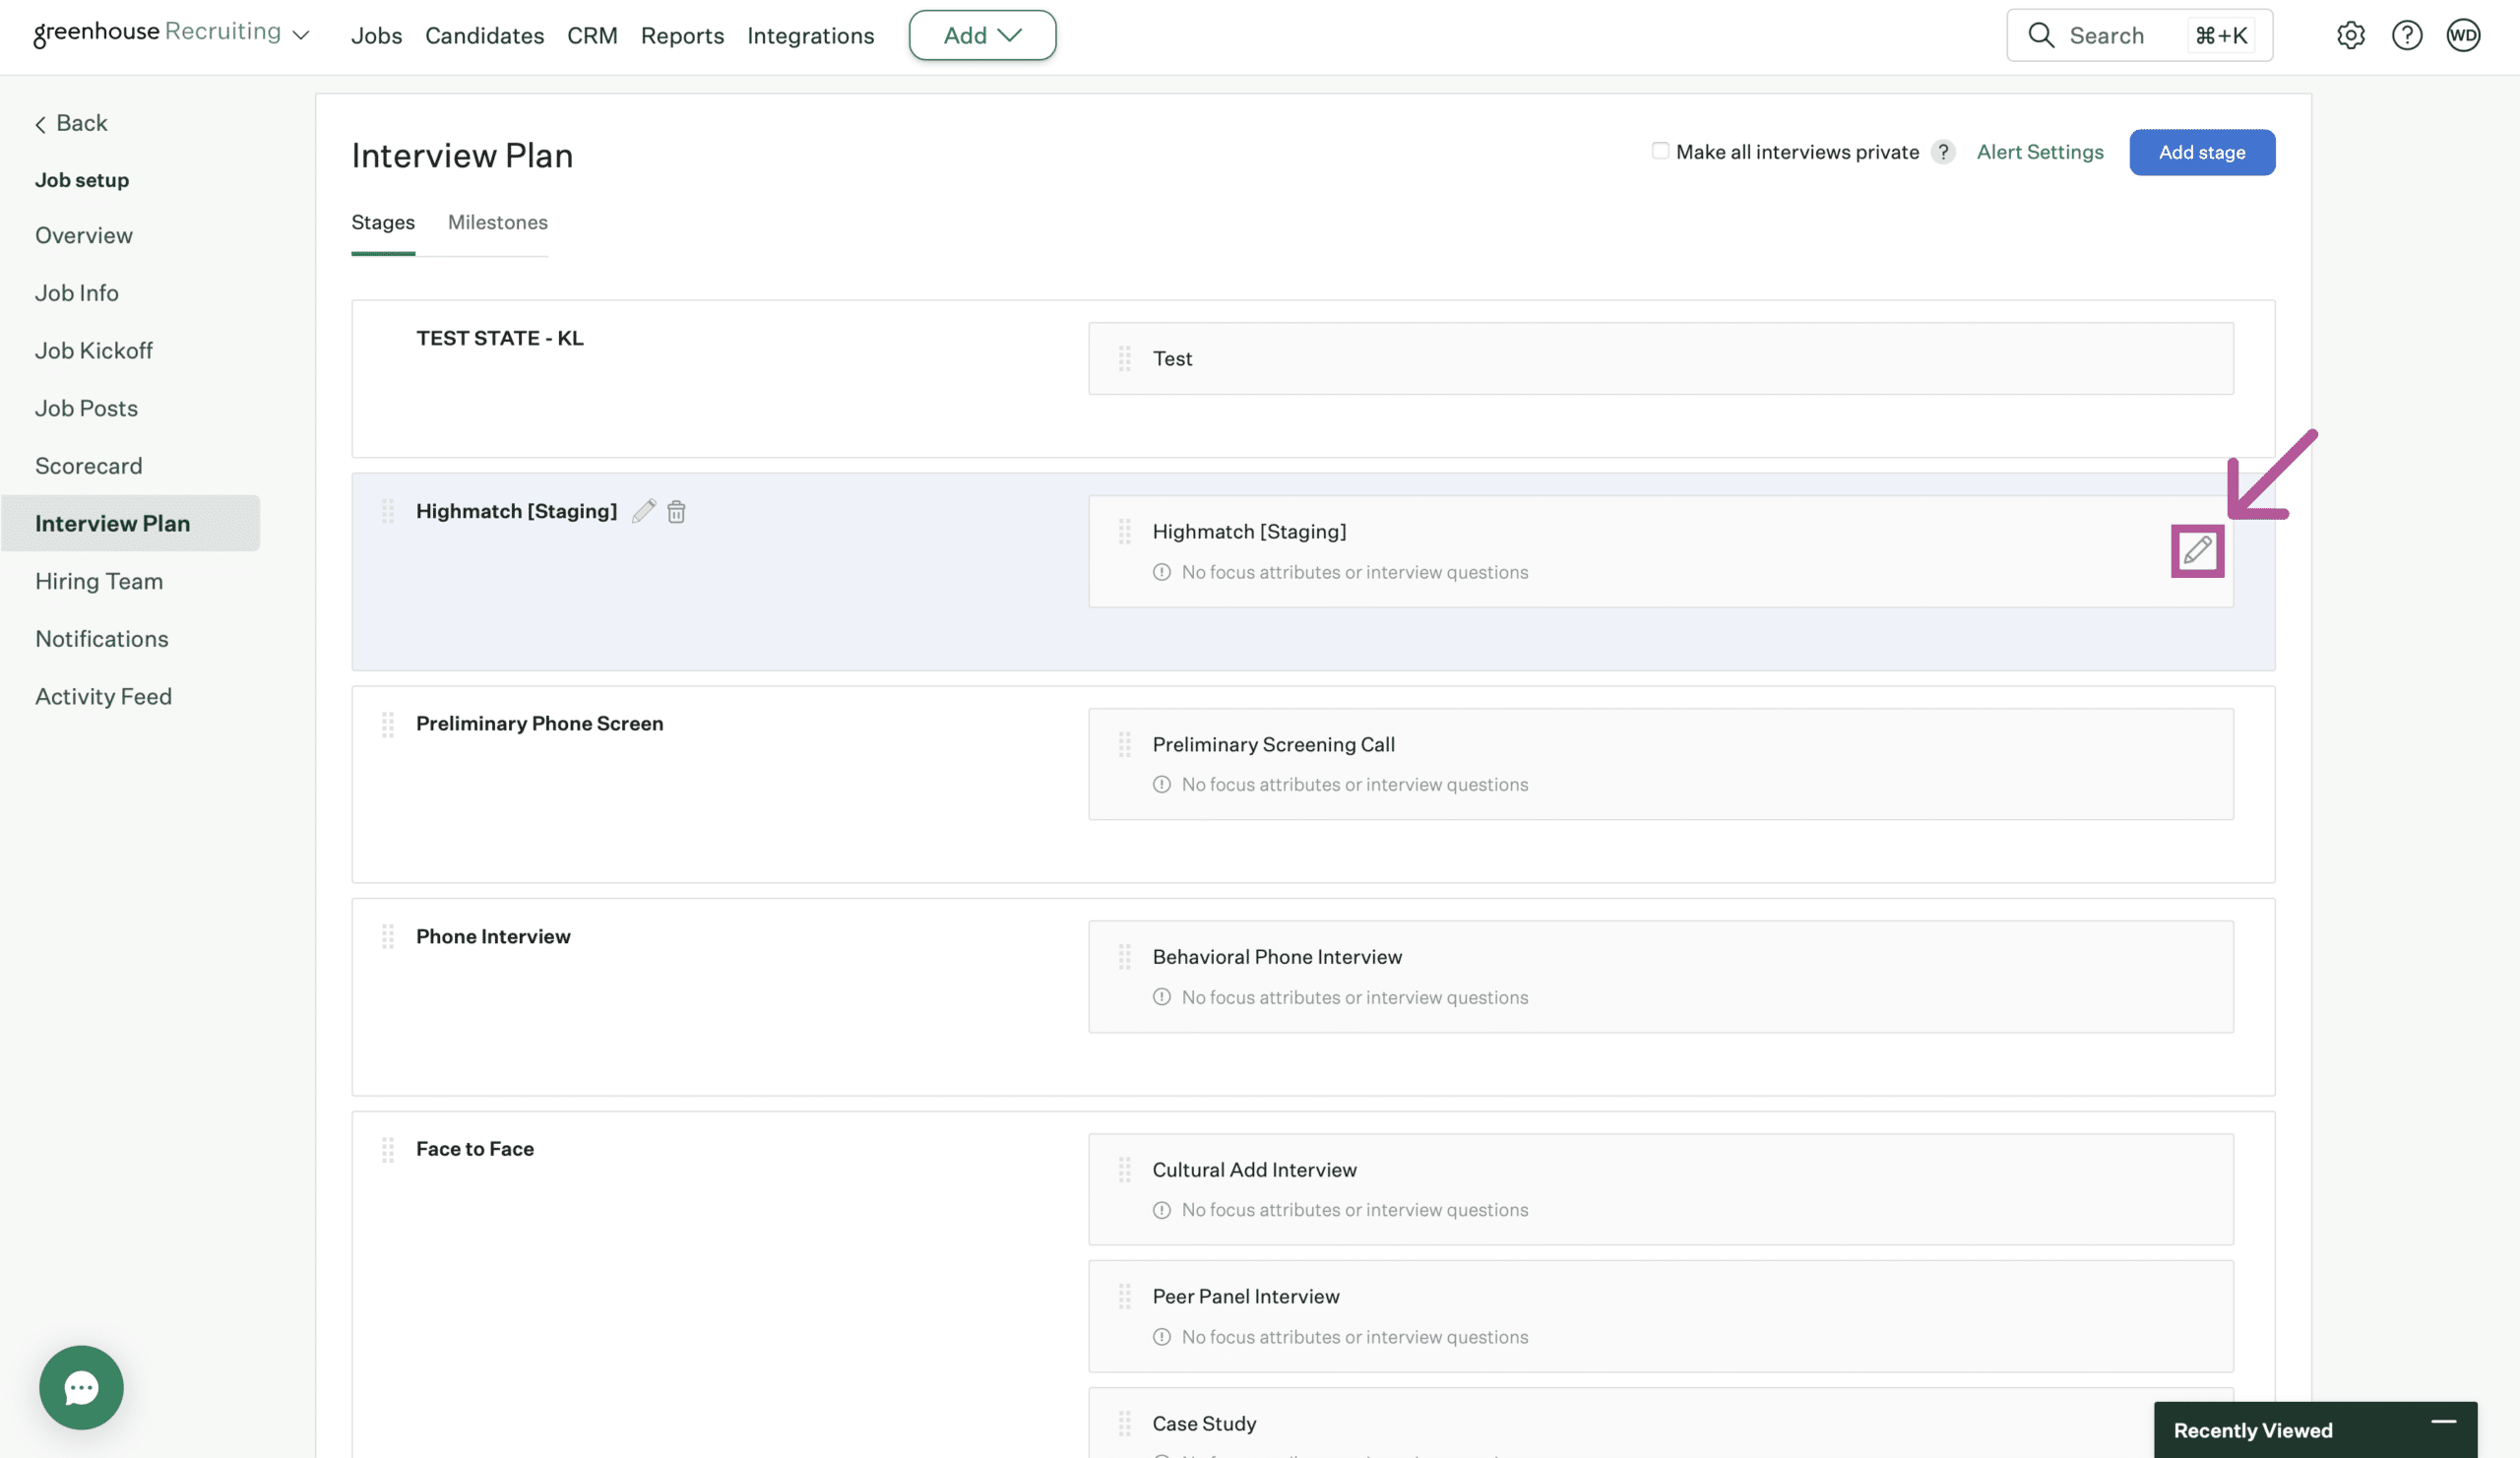
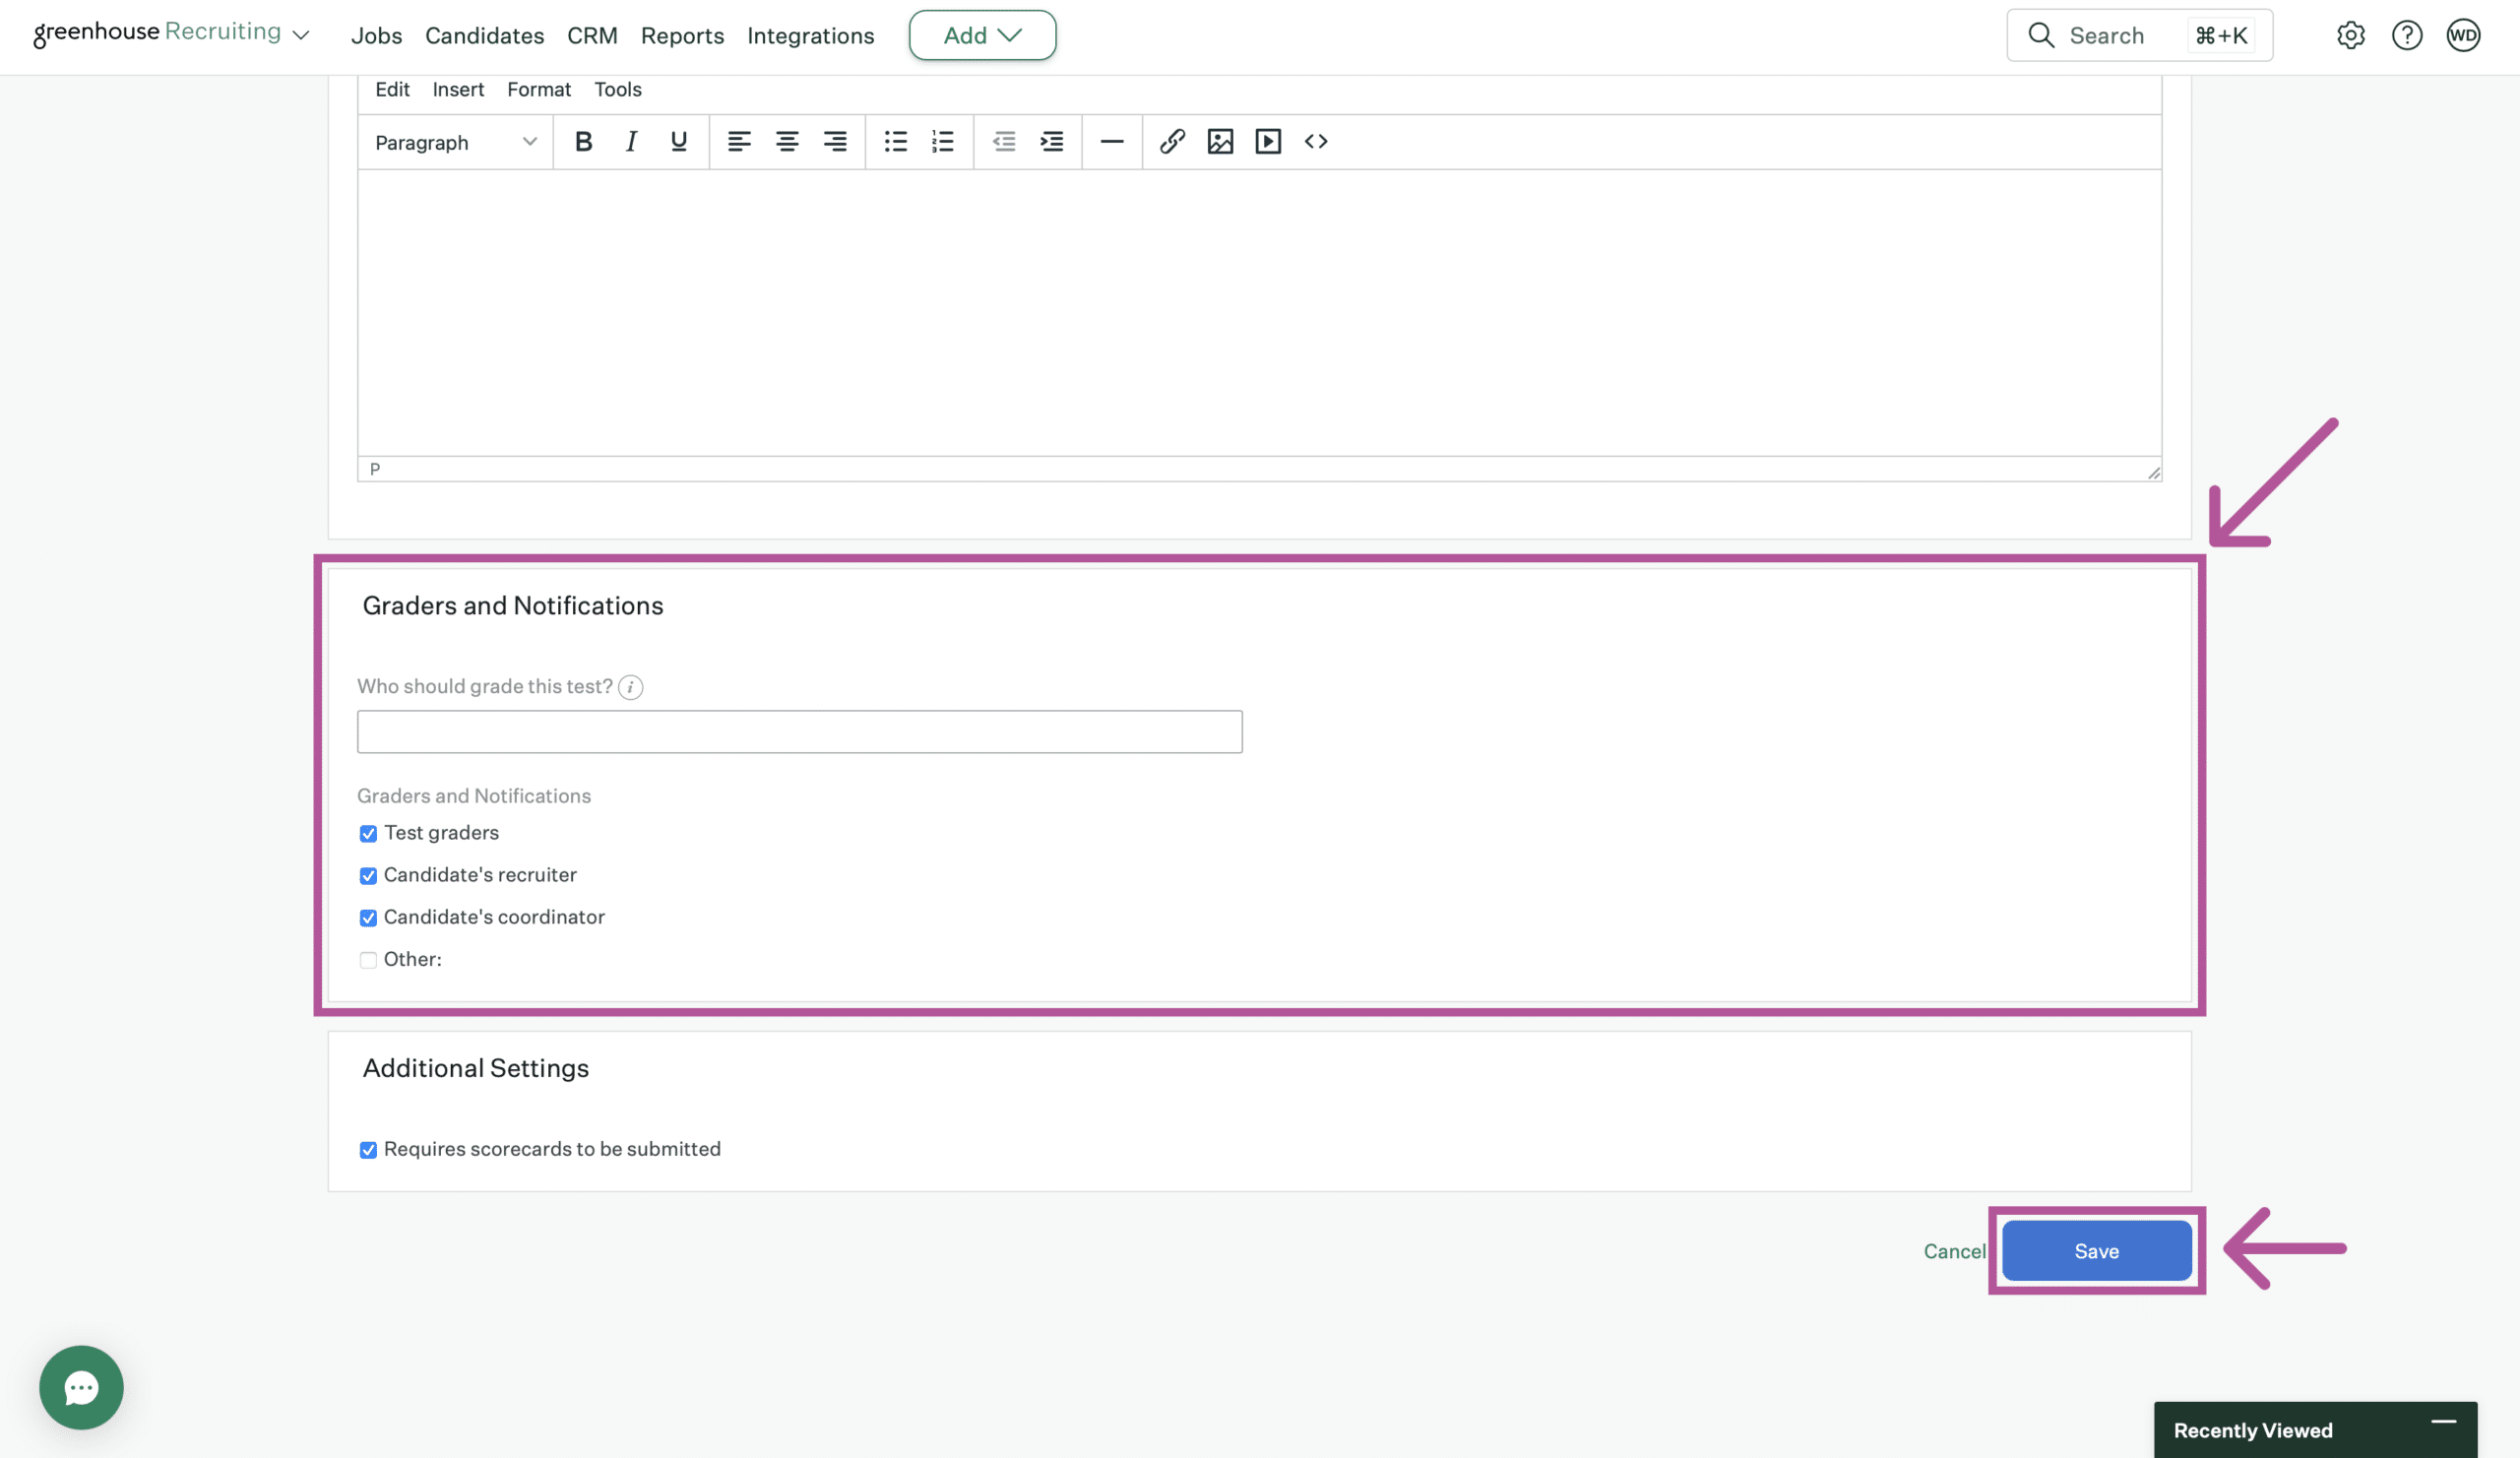
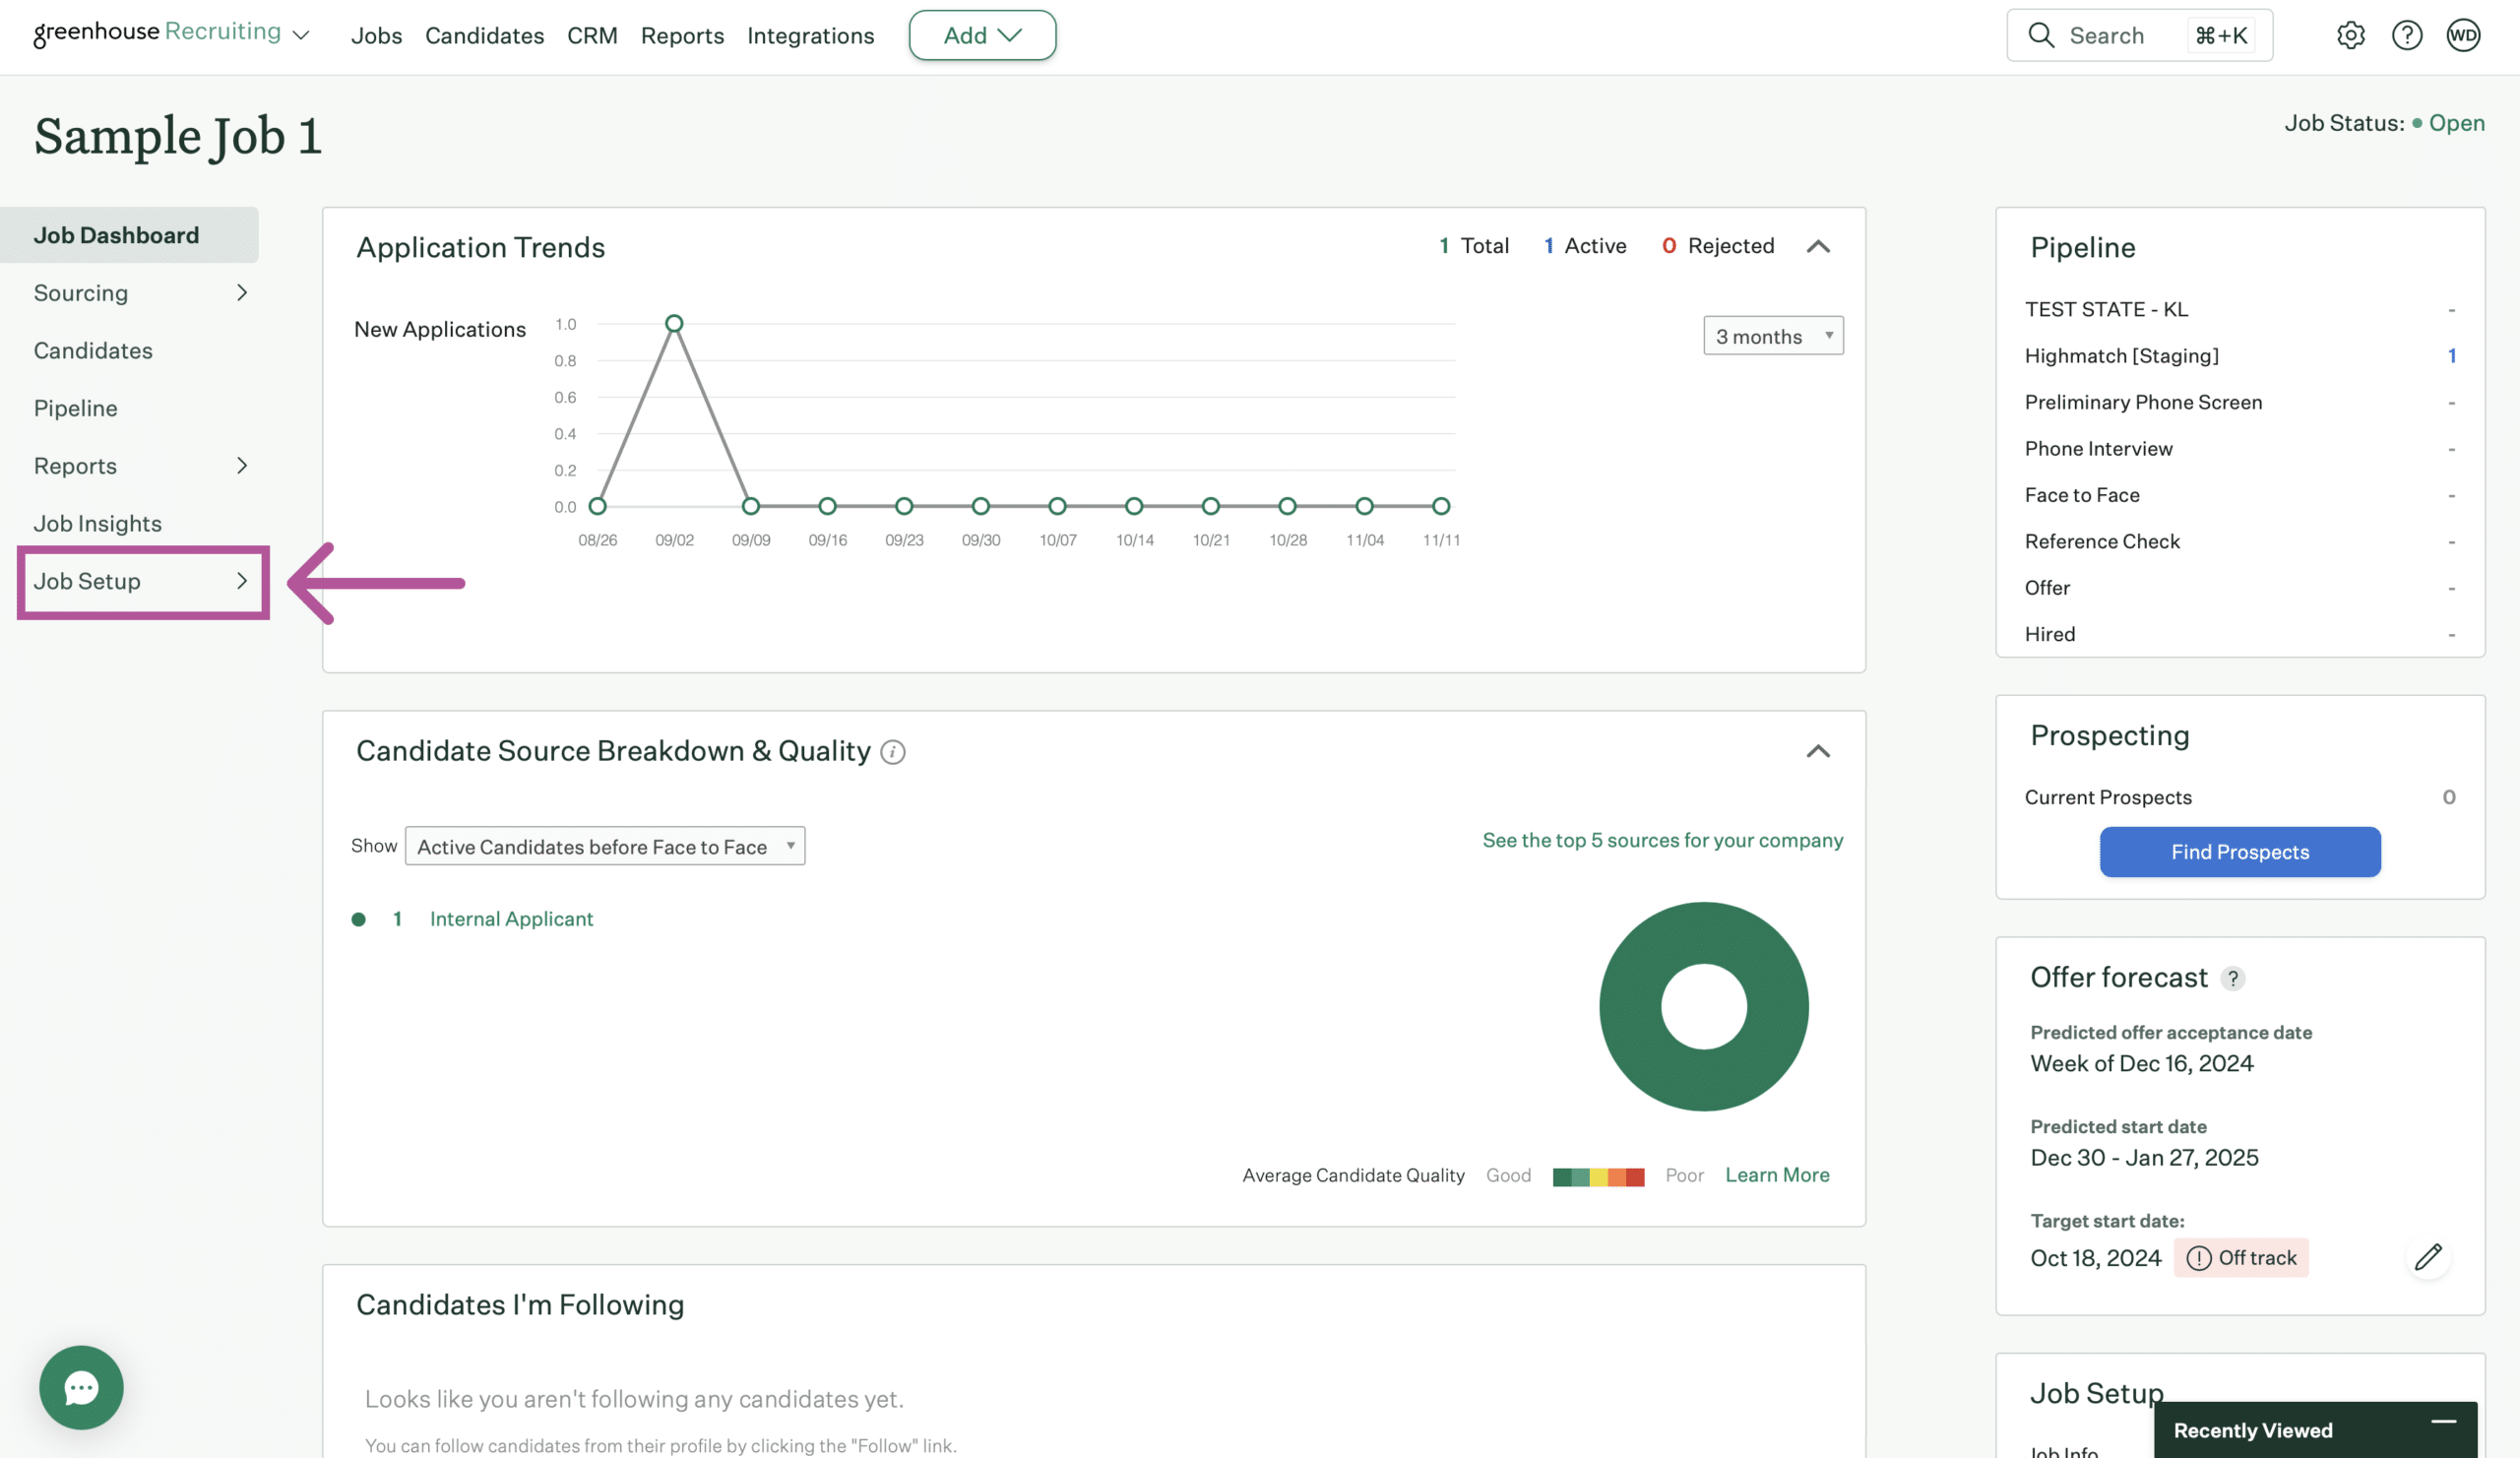
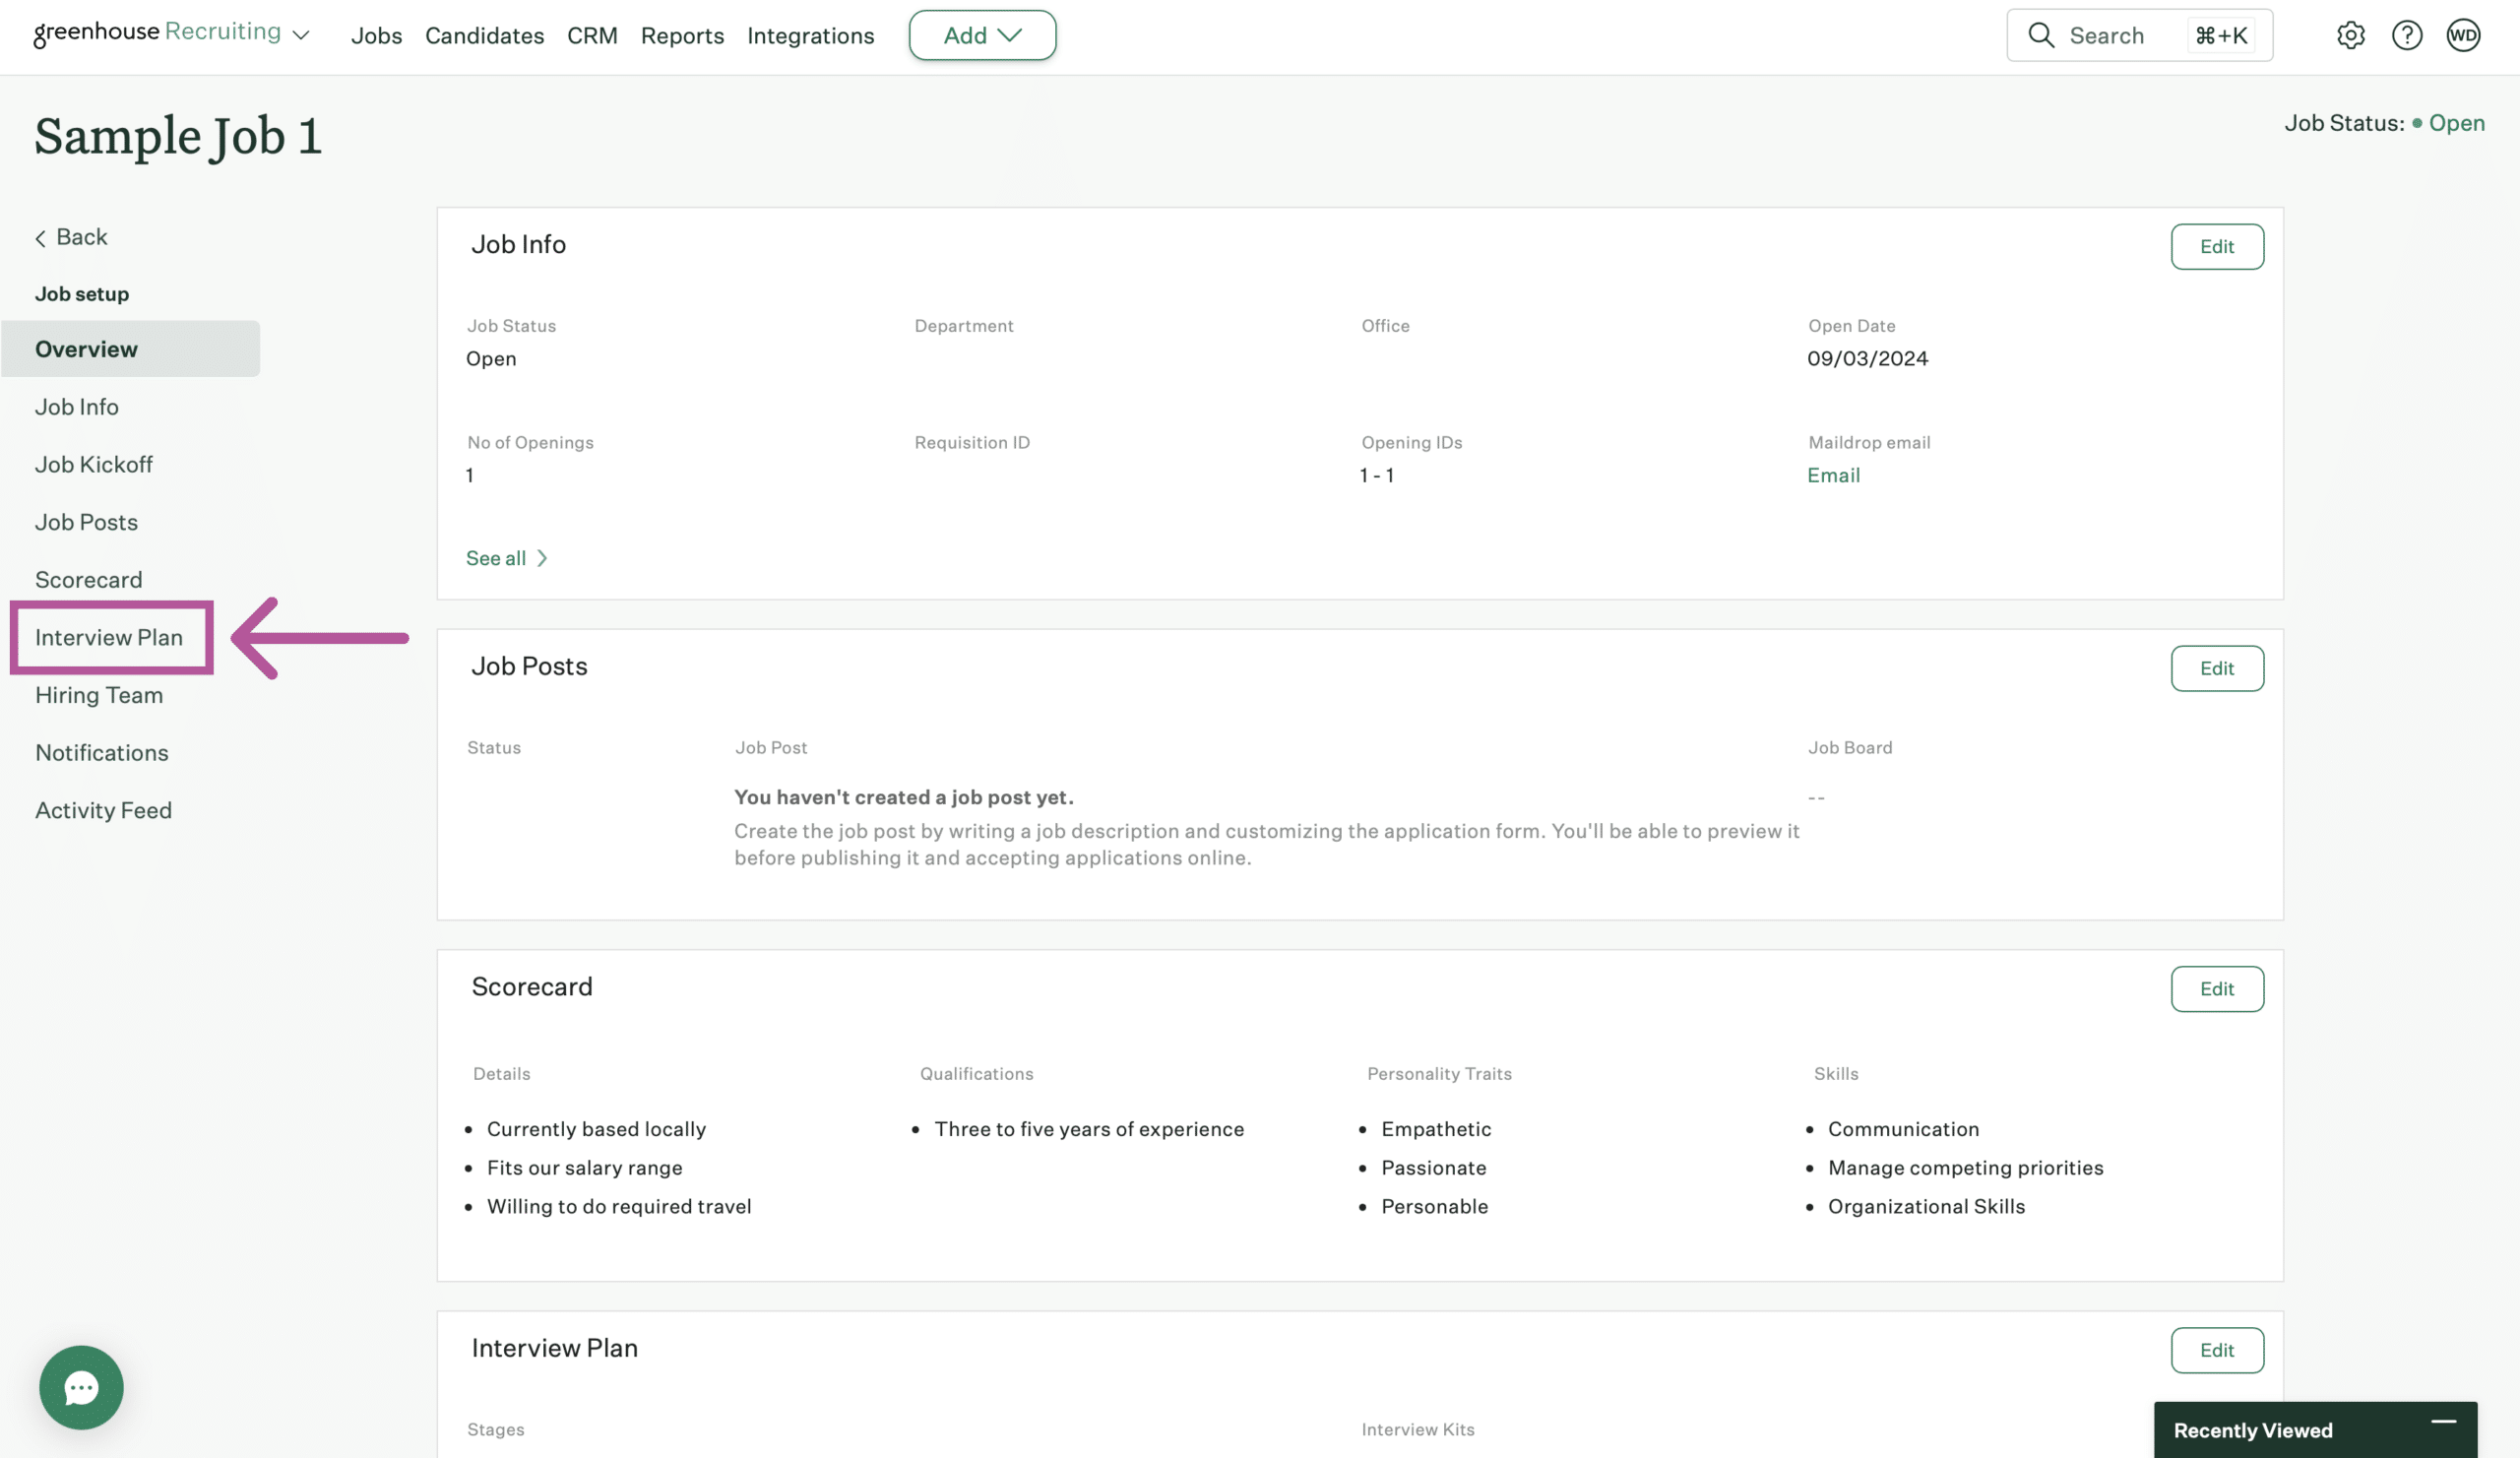
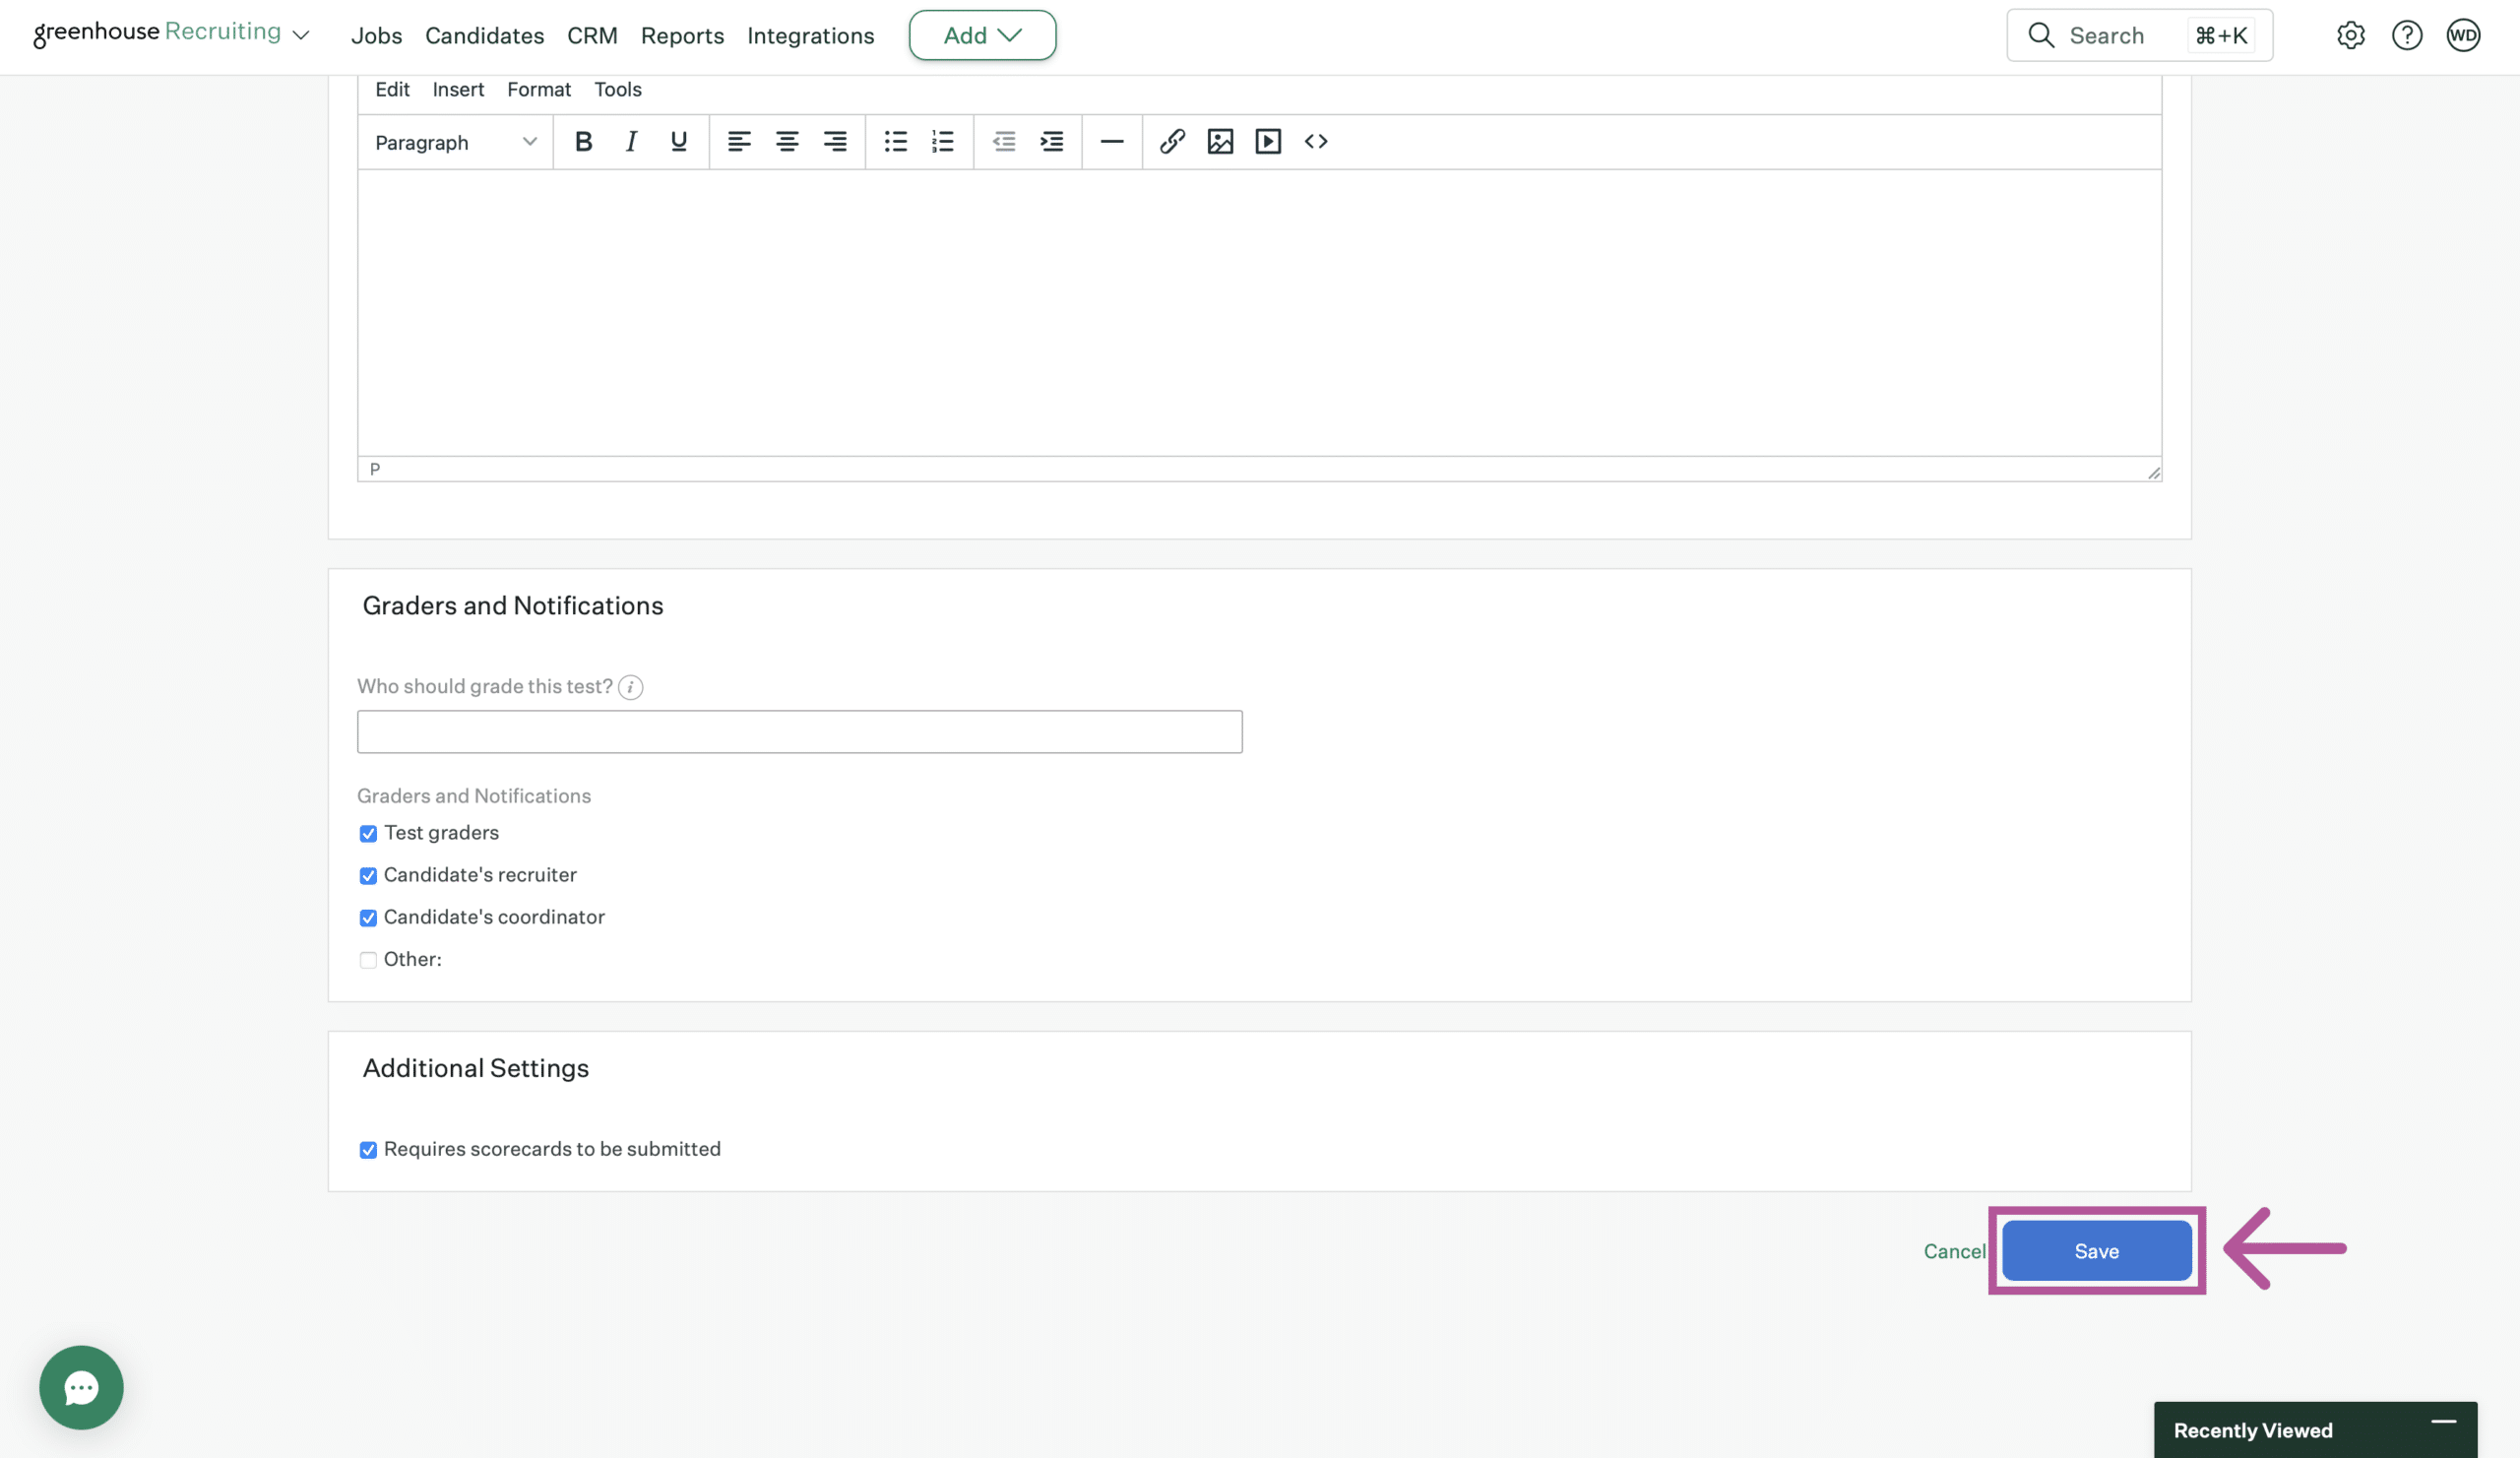
- Back on your test job, Click Job Setup > Interview Plan > Click the Edit Interview button for the HighMatch stage. Go down to “Graders and Notifications” and select some graders.
- Select either the test user you just created or the existing user you wish to use. Click the Save button at the bottom of the page once done.
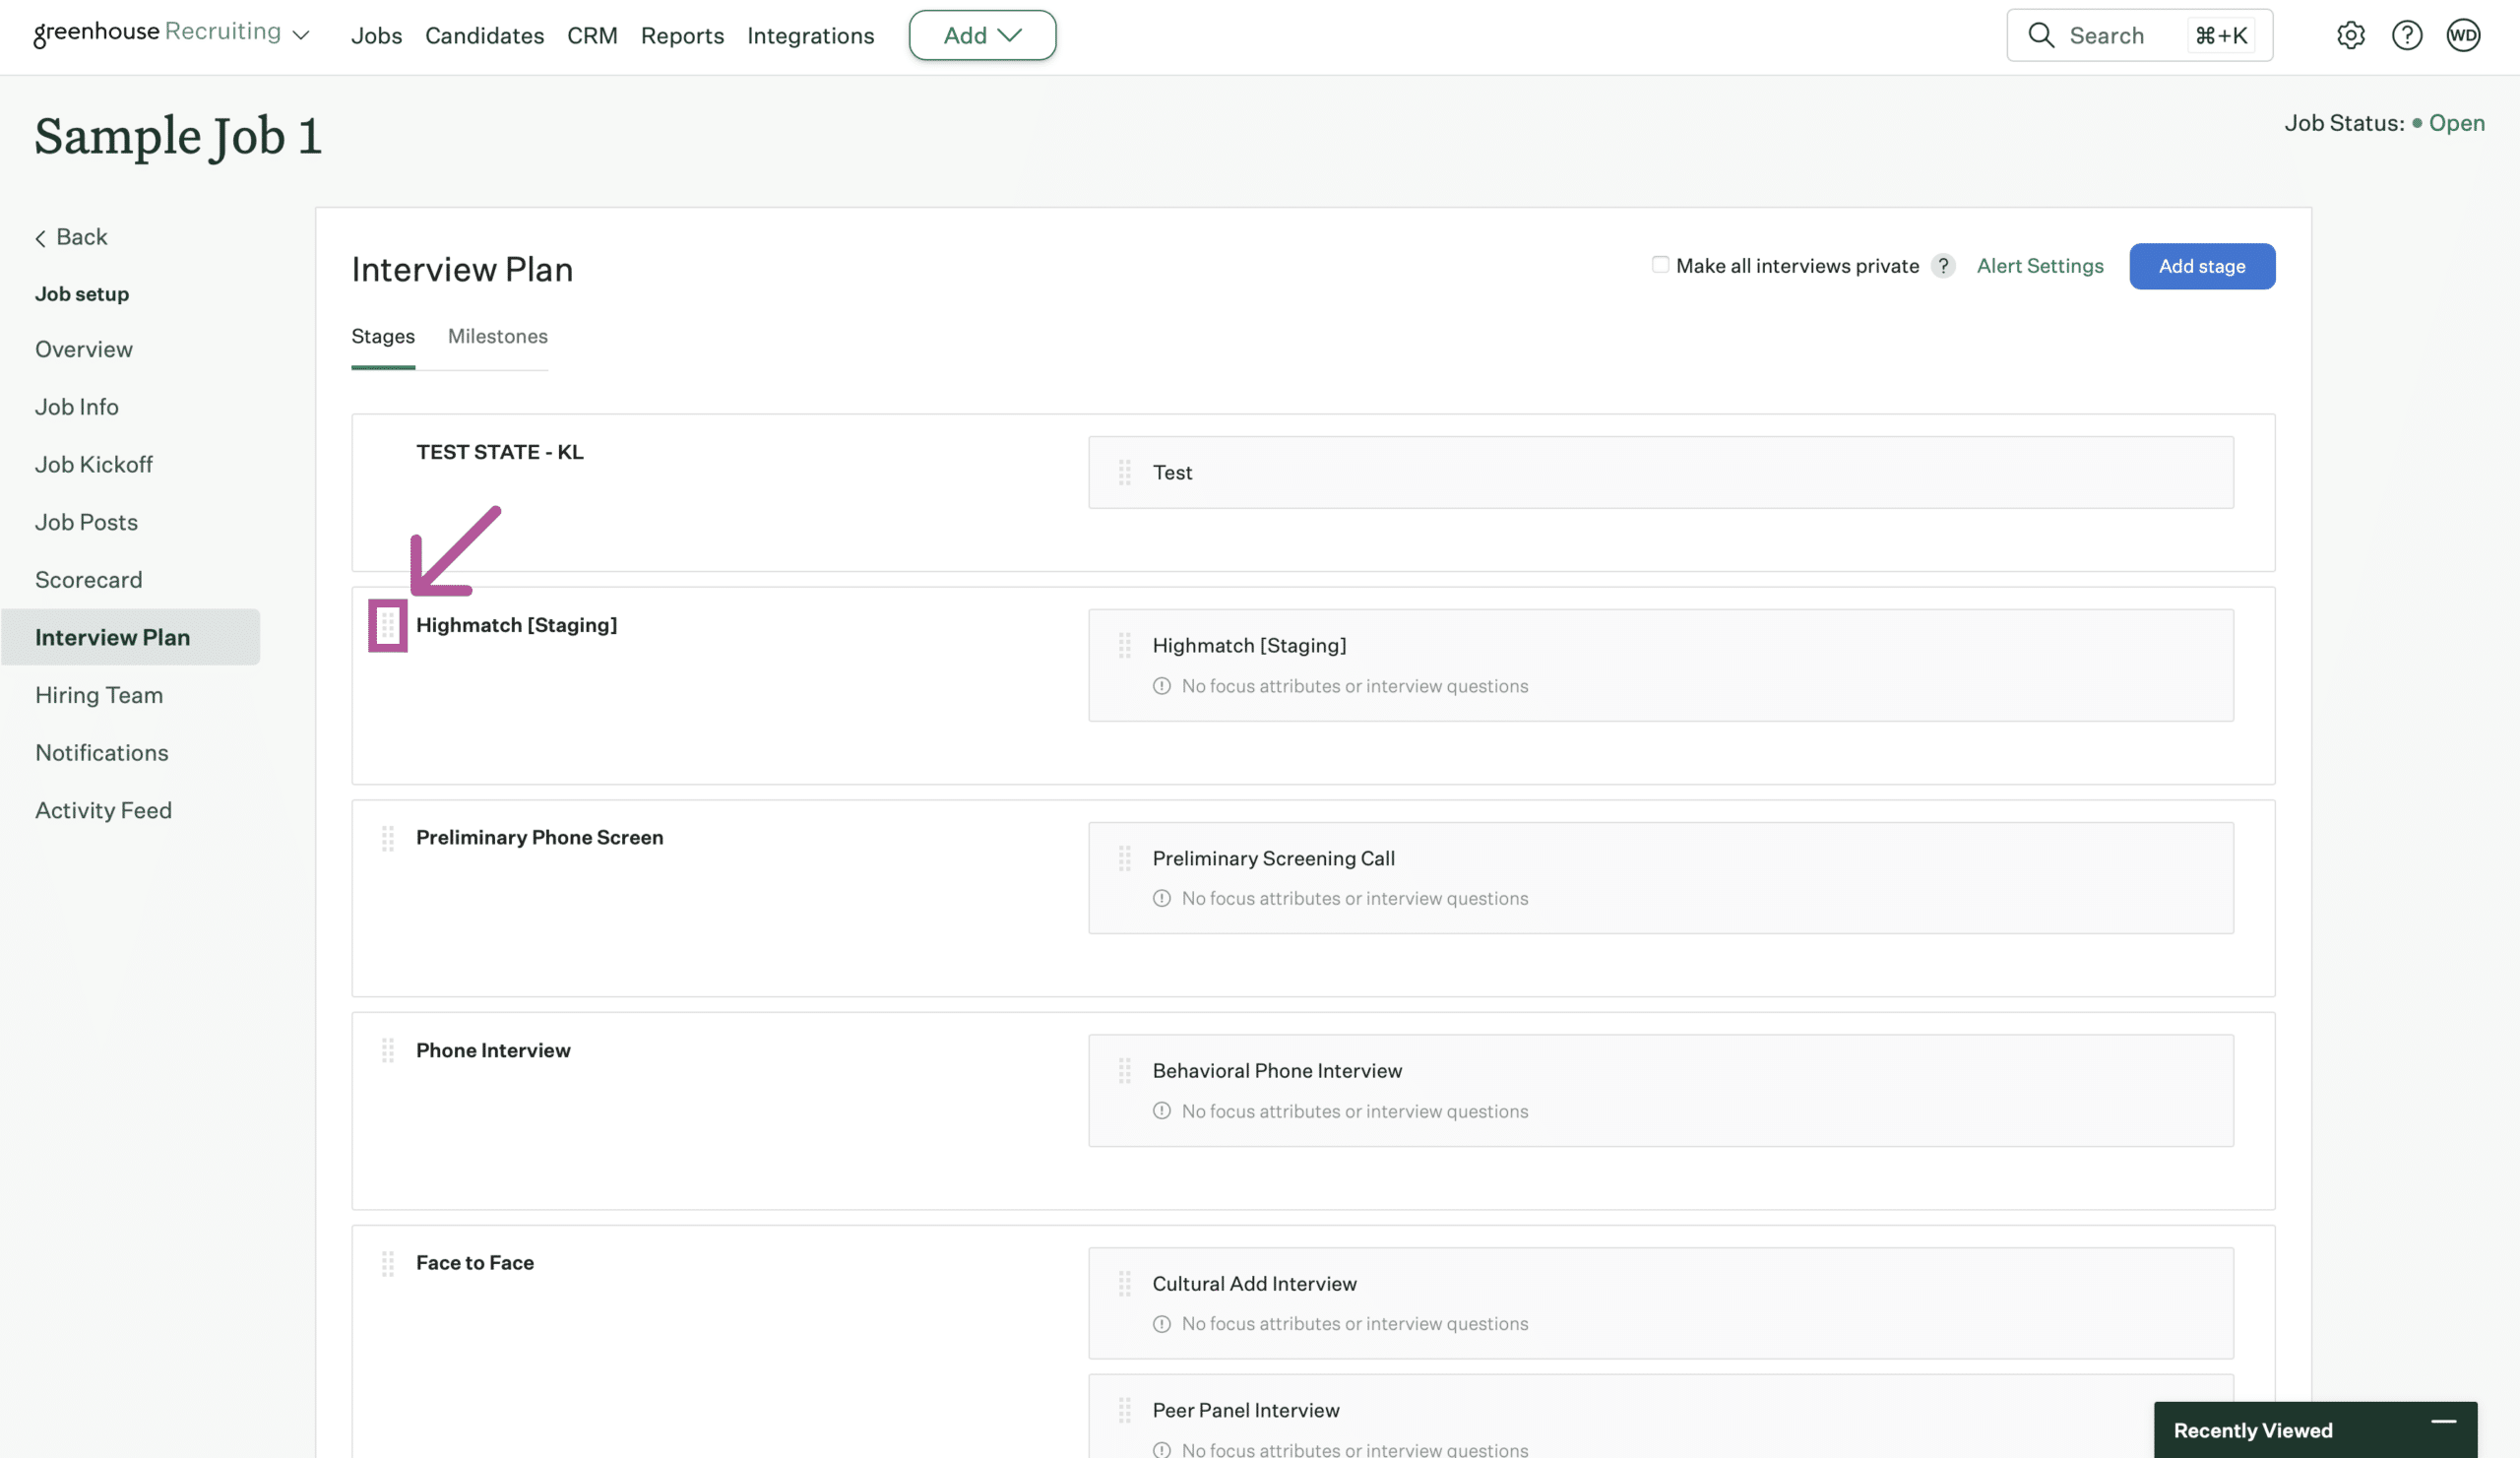
Step 5: Specify the Stage for HighMatch assessments in your Hiring Pipeline
Now that the HighMatch integration is enabled on your account, you will need to add the HighMatch stage to your hiring pipeline to trigger assessments. Anytime a candidate is moved into this stage, you may manually trigger an assessment request (see Step 7).
- On your test job, Click Job Setup > Interview Plan.
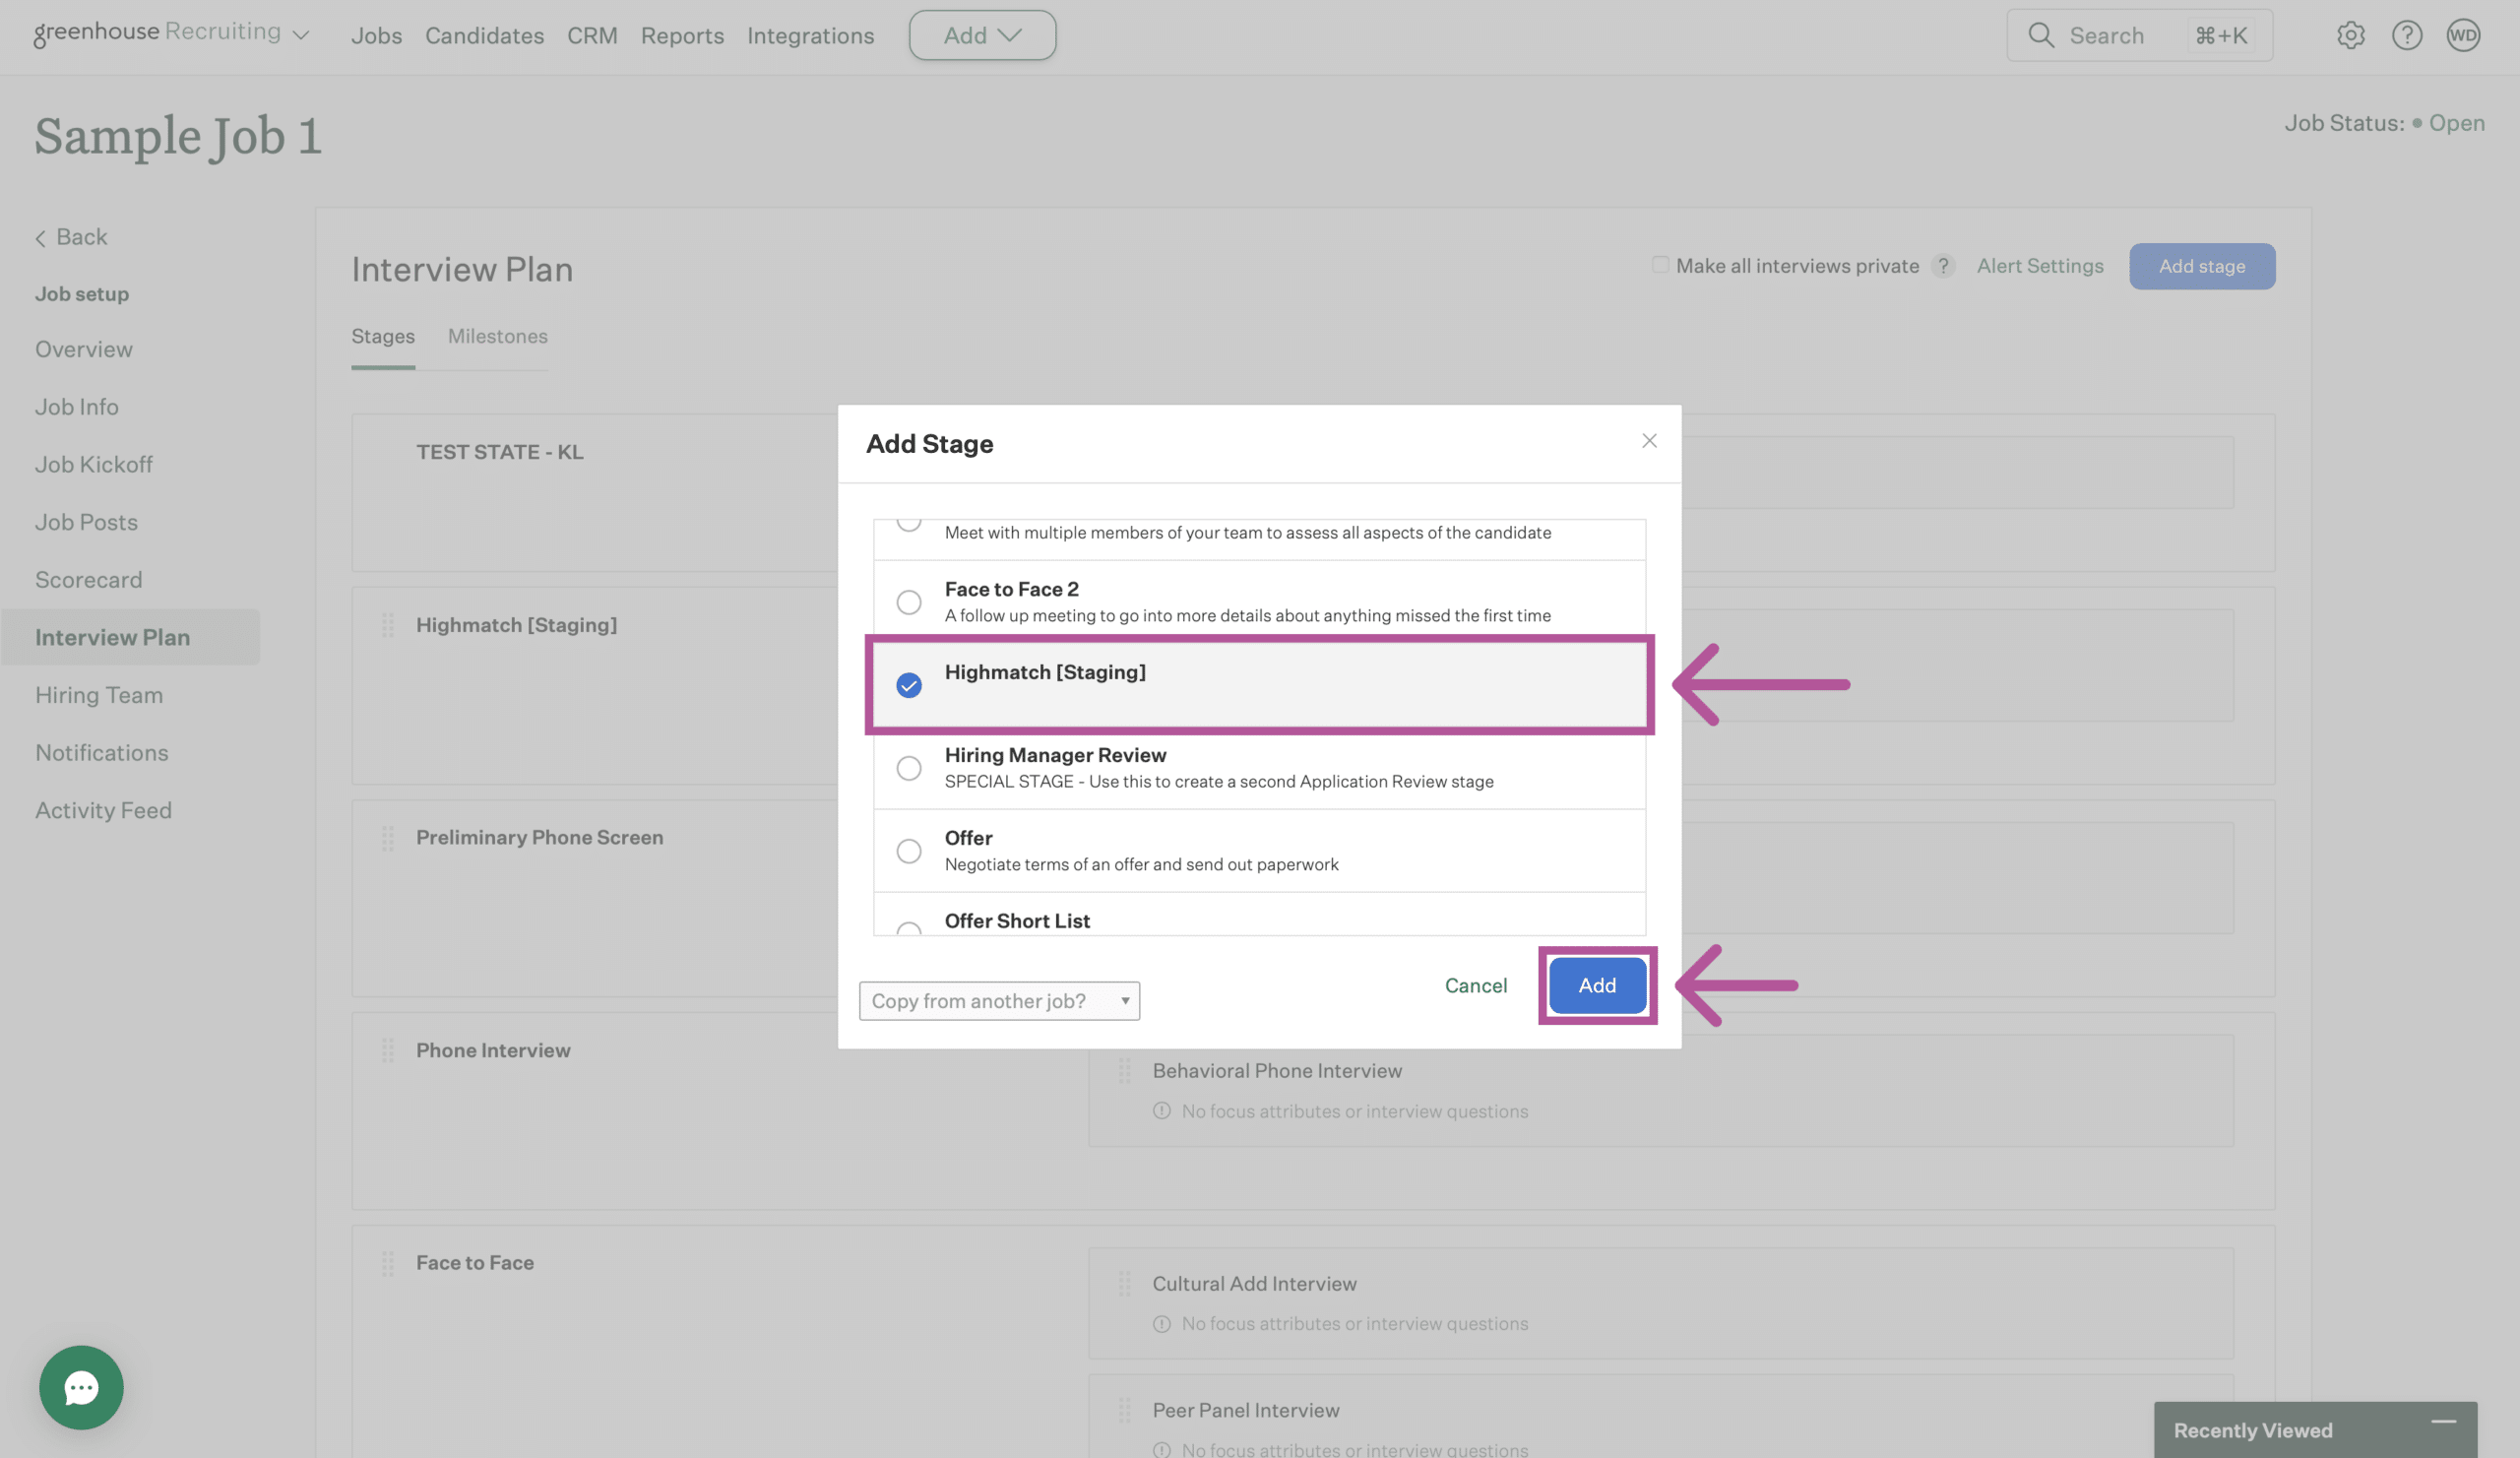
- Click Add stage > search for or select HighMatch > click Add.
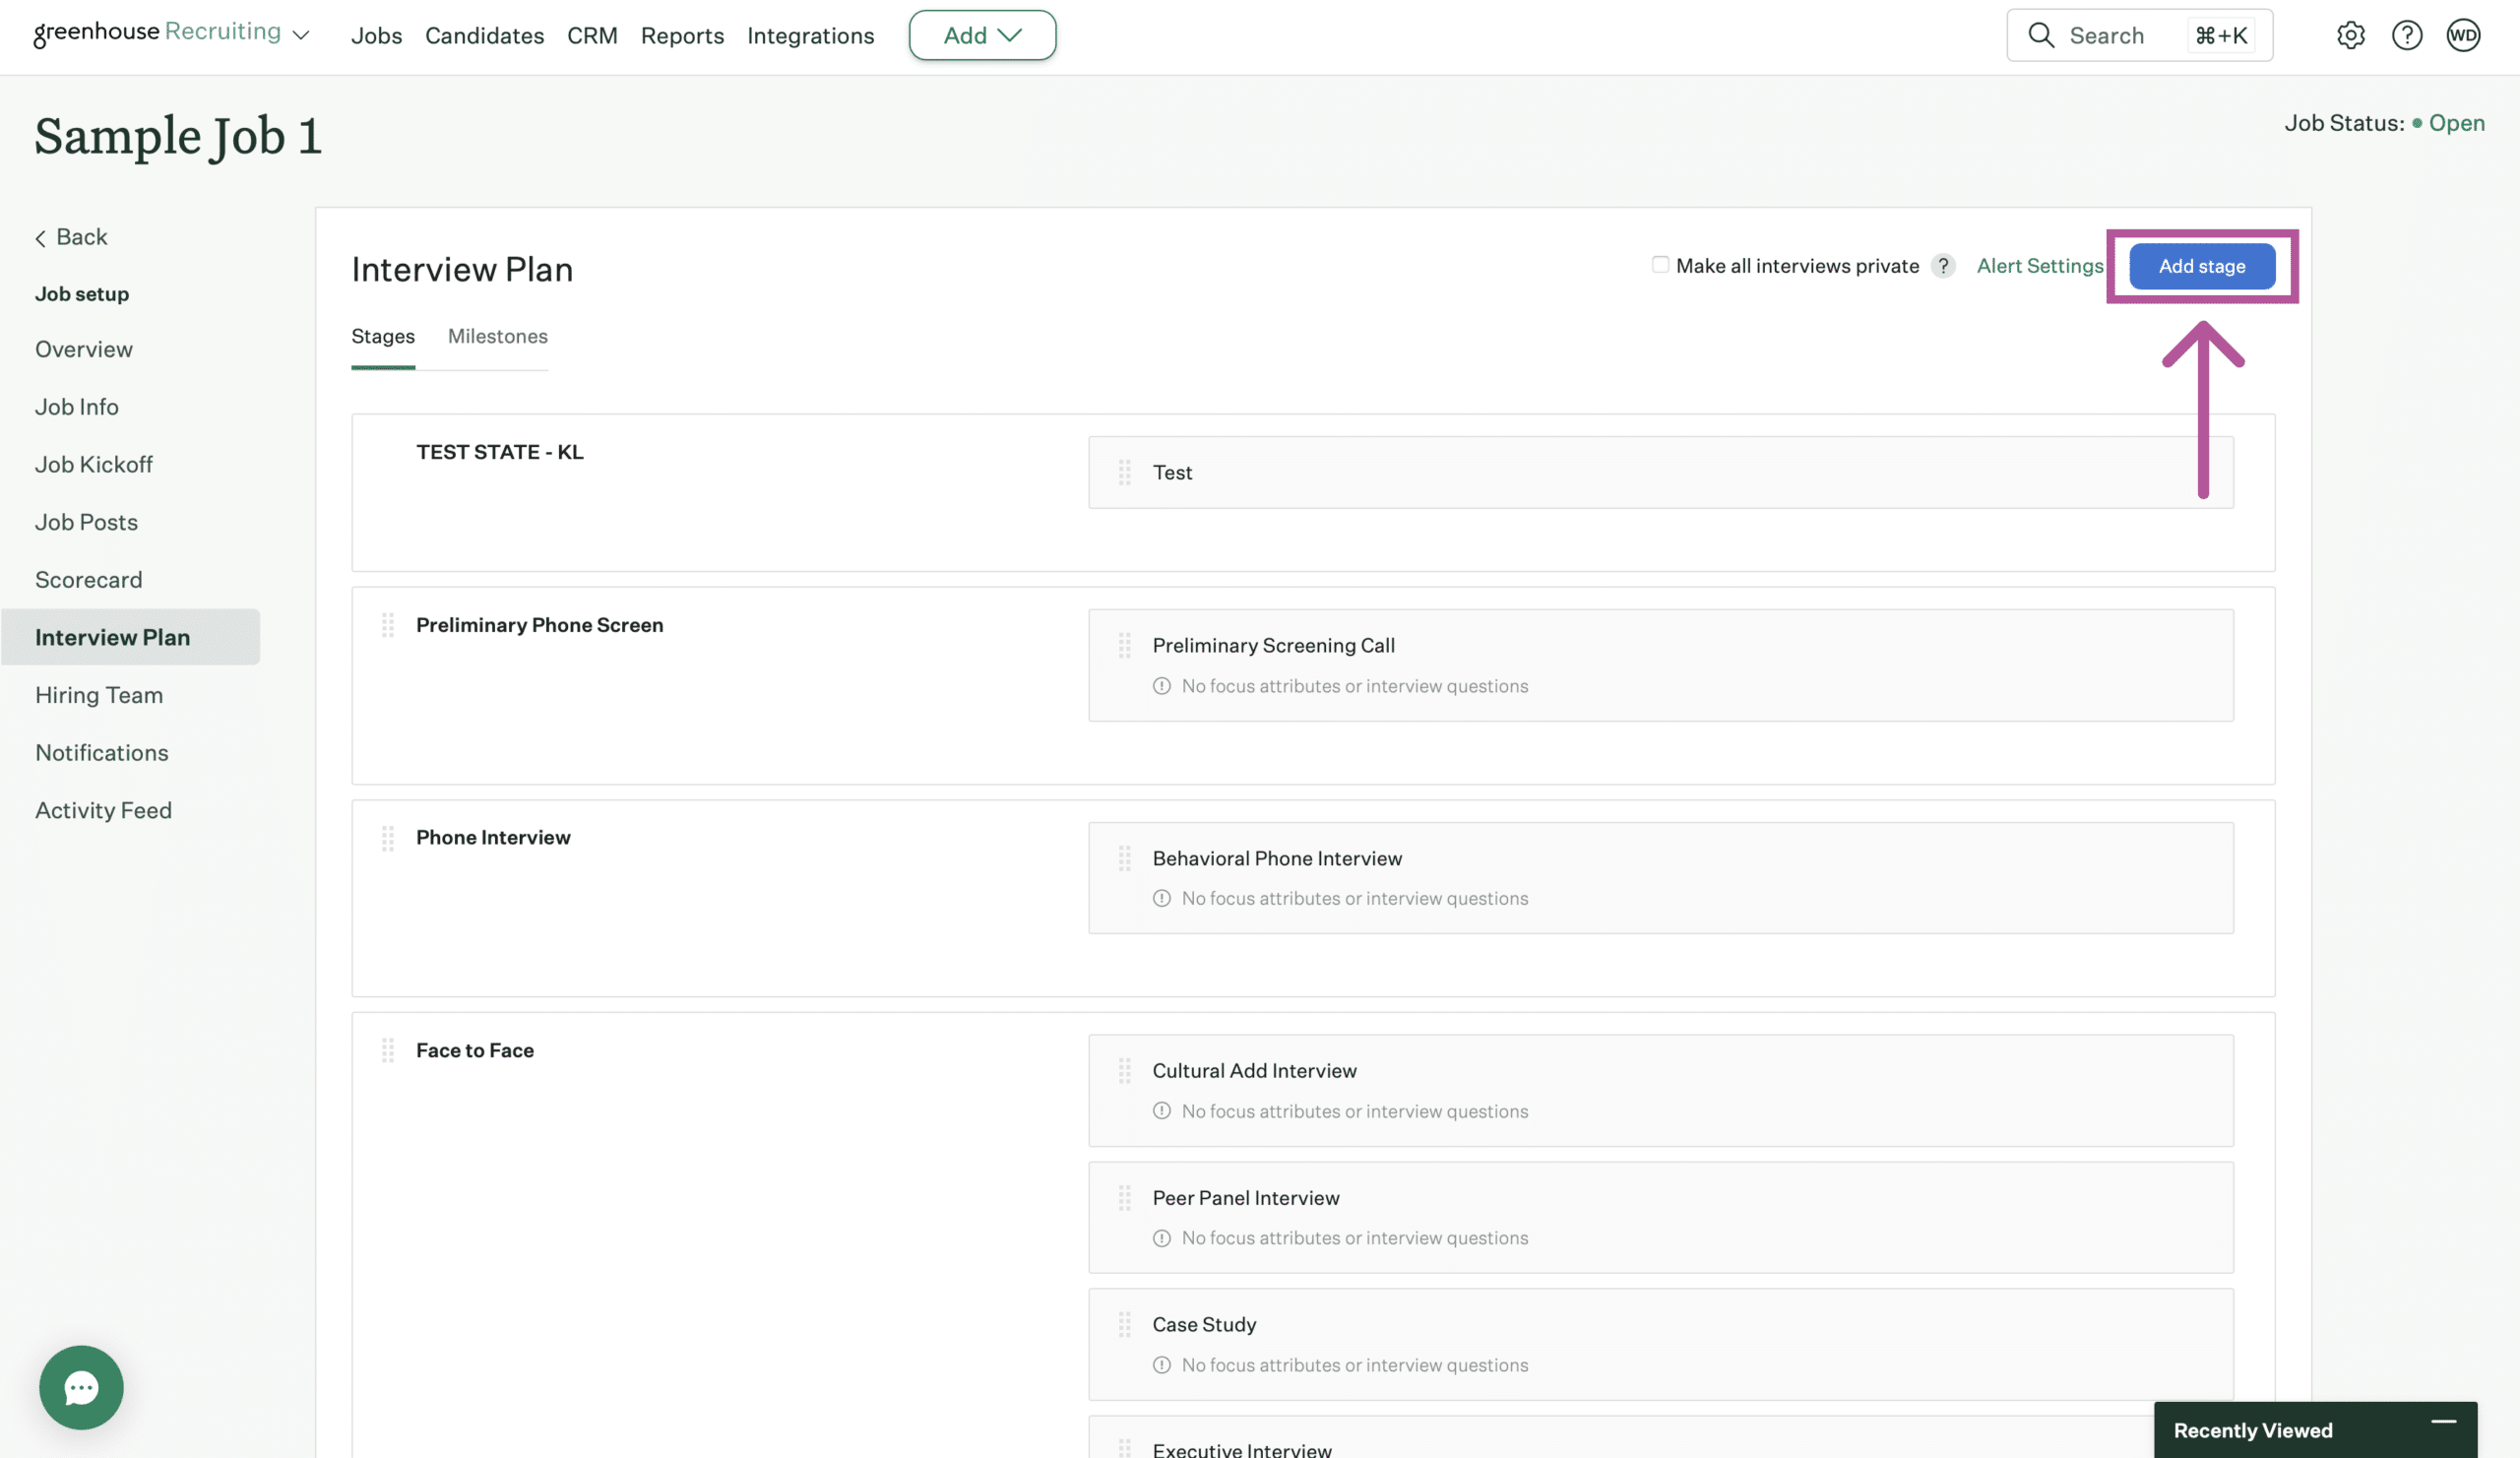
- Sort the HighMatch stage by clicking and dragging using the Move button to your preferred step in your hiring pipeline.
Once your setup is complete, it is time to book a call with your HighMatch Success Team Manager at support@highmatch.com with the information in Steps 1-5 above. We will guide you through the remainder of the setup and testing process (Steps 6-8 below).
Step 6: Add an Assessment to a Job
To start sending assessments, you will need to start by adding an assessment to the job that will be sent to a candidate once they have been moved into the HighMatch stage in your hiring pipeline.
Note: Leaving this area blank will require you to manually select the assessment each time a candidate is added to the HighMatch stage, find out more in Step 7.
Follow the steps below to learn how to add an assessment to allow the assigned assessment to be sent automatically to a candidate:
- Open the test job you were requested to build or identify in Step 2 at the beginning of this guide.
- Click Job Setup > Interview Plan > Click the Edit Interview button for the “Highmatch” stage.

- Select the assessment you would like to use for this test job under the HighMatch Test to Send Candidate > Test Name field.

- Click the Save button at the bottom of the page once done.
Step 7: Manually send an Assessment
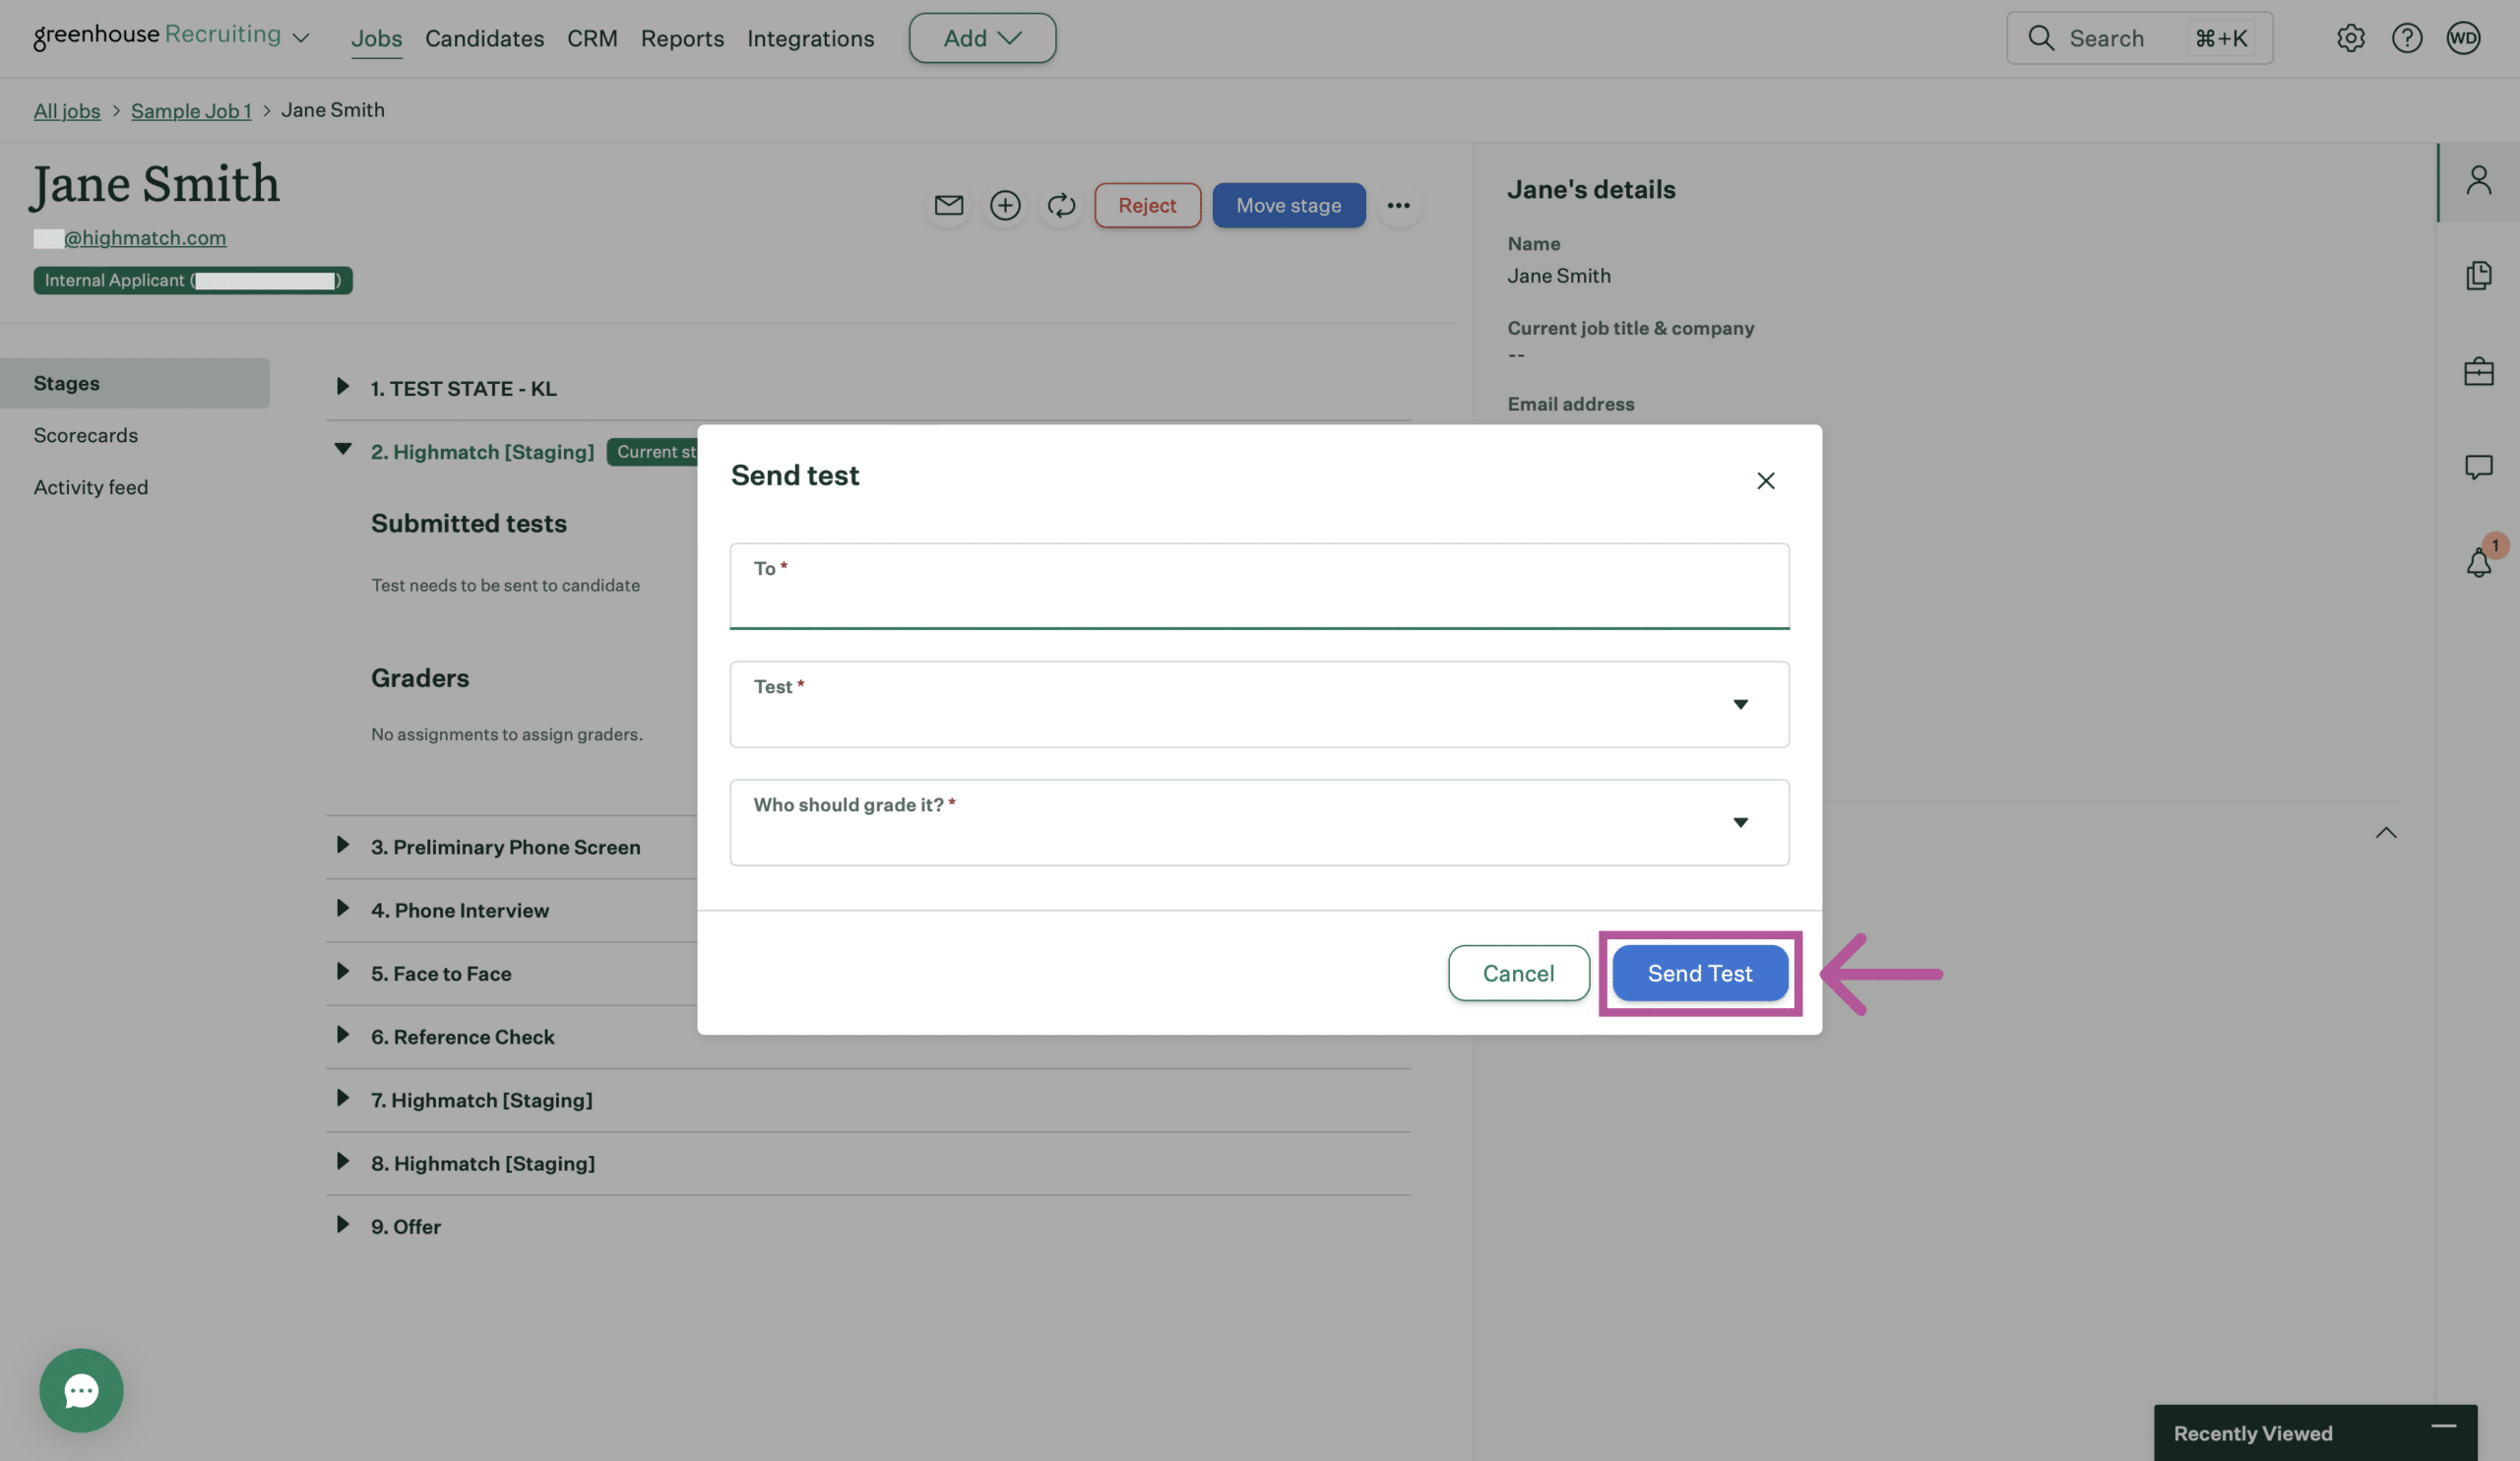
To manually send an assessment to a candidate:
- Select the test candidate that you identified in Step 2.
- Move the candidate into the HighMatch Stage by clicking Move stage and selecting the HighMatch stage.
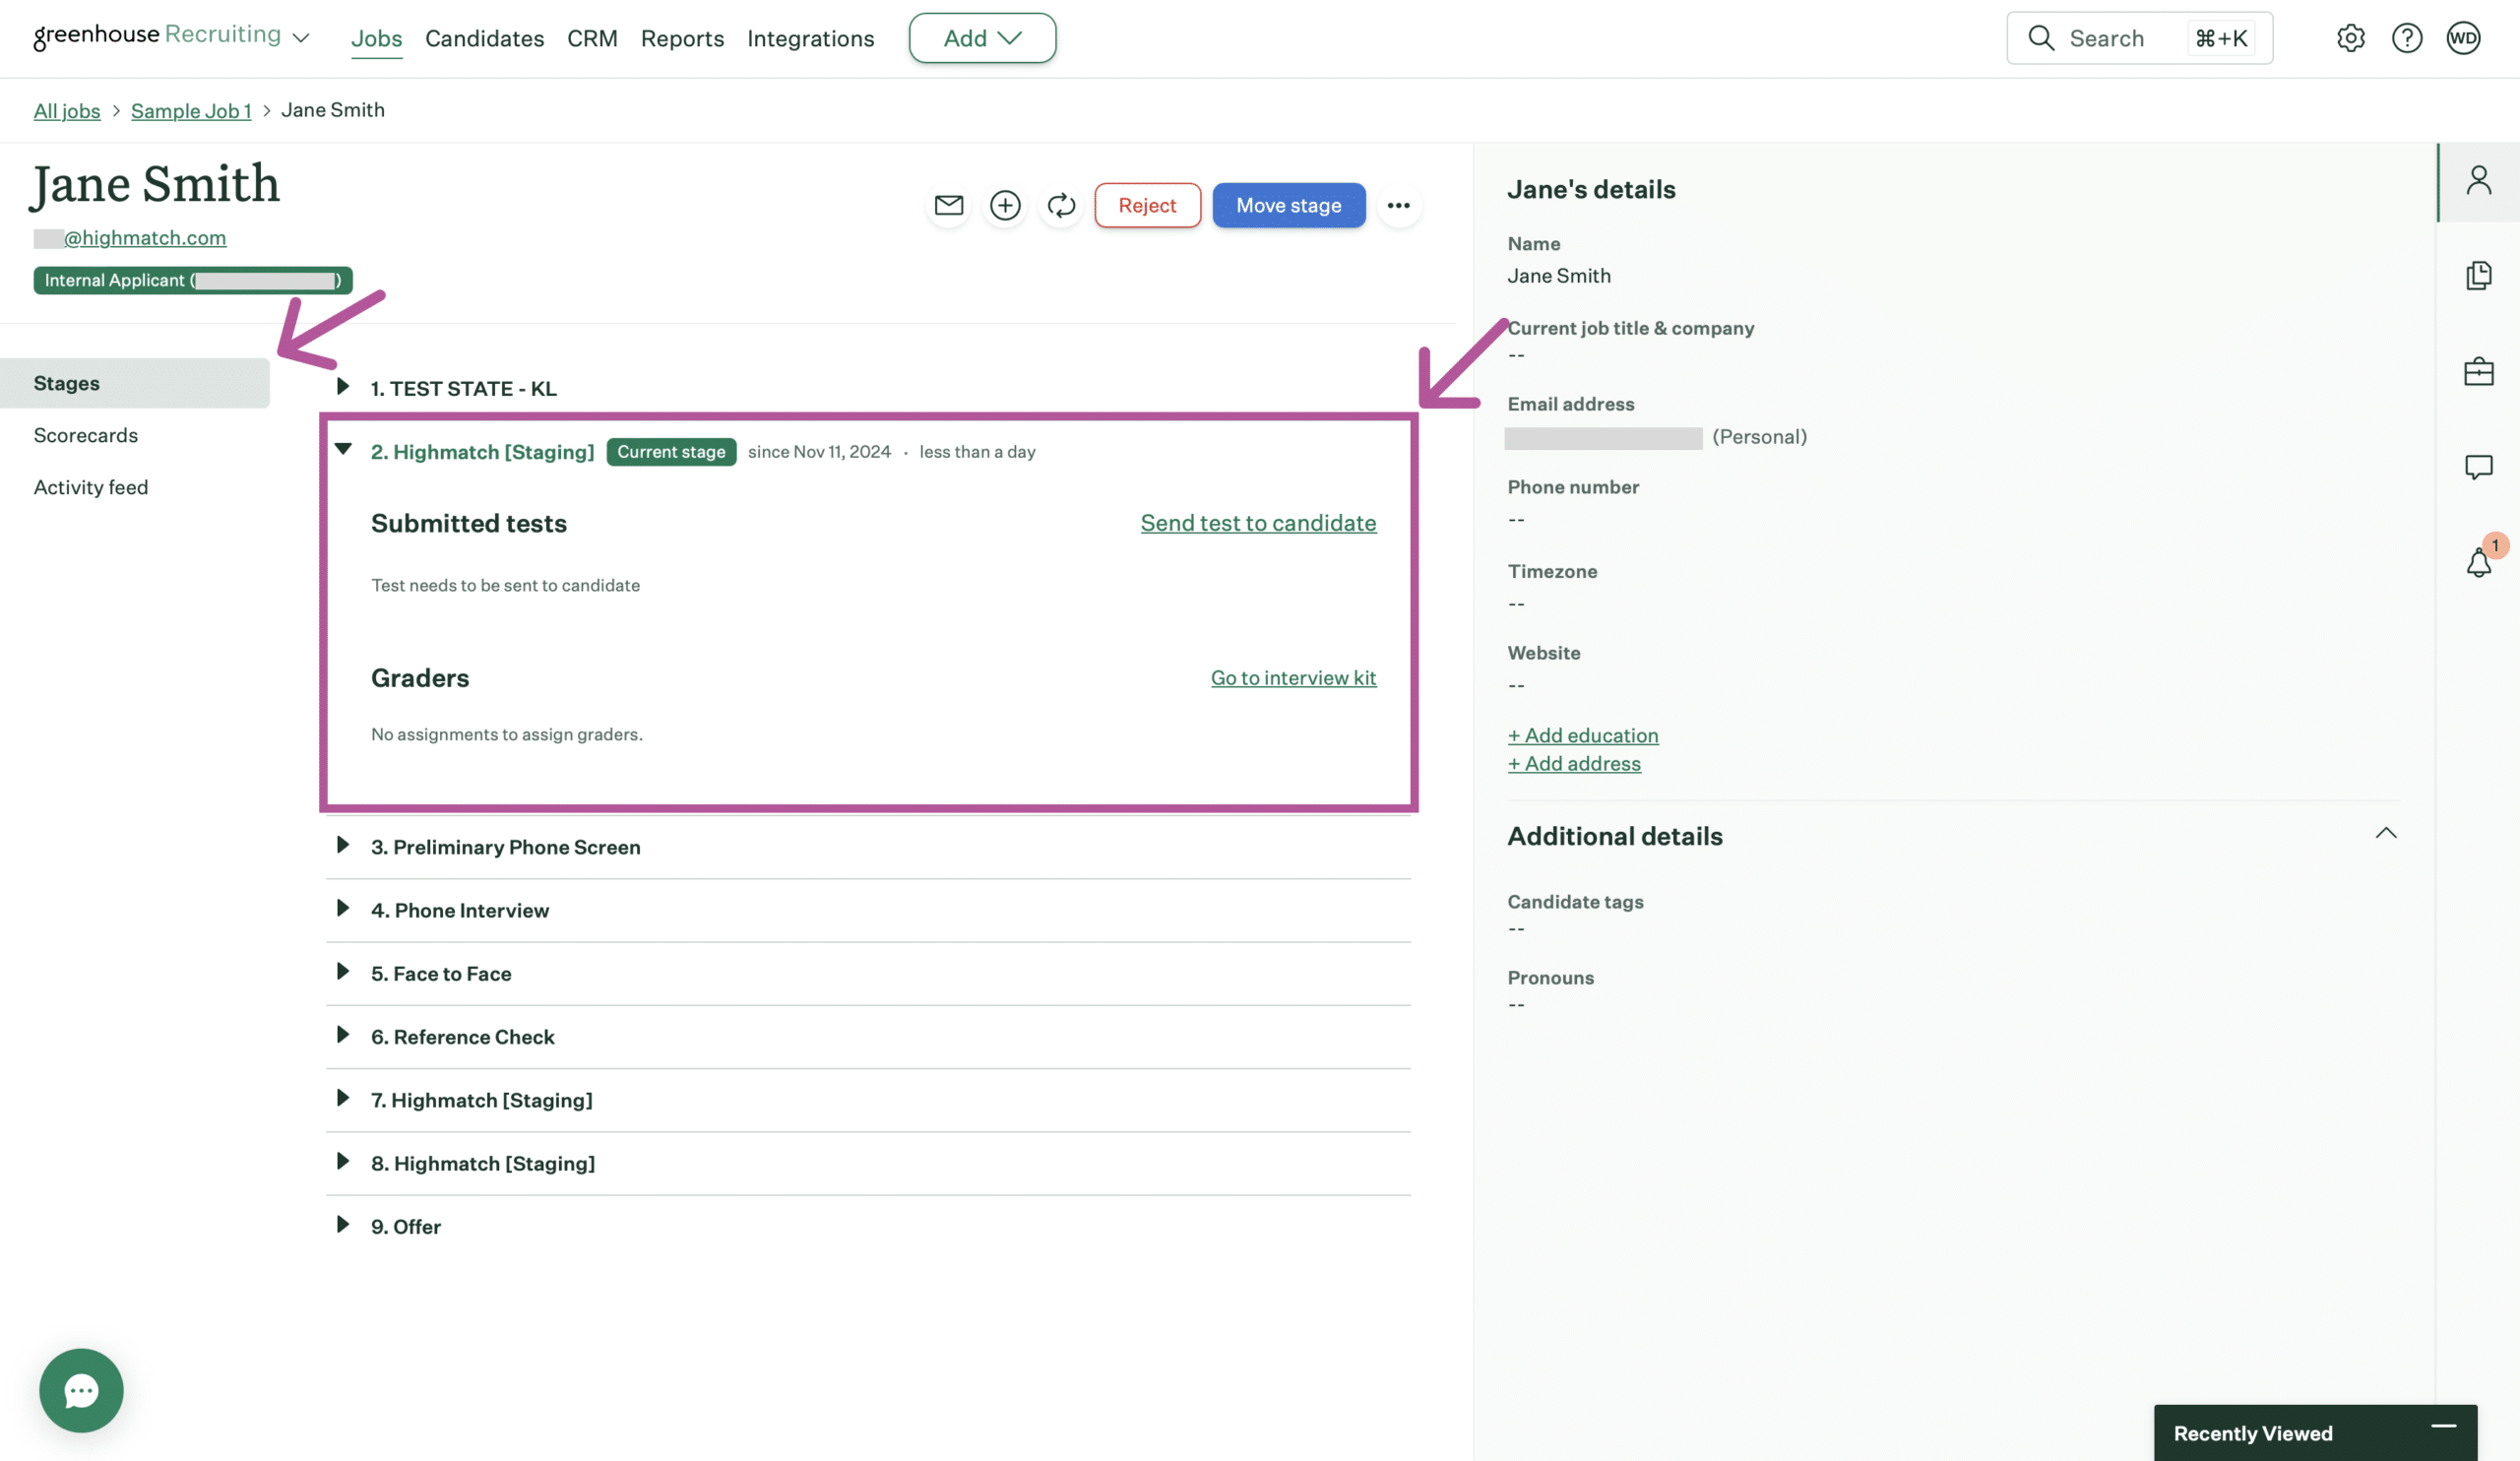
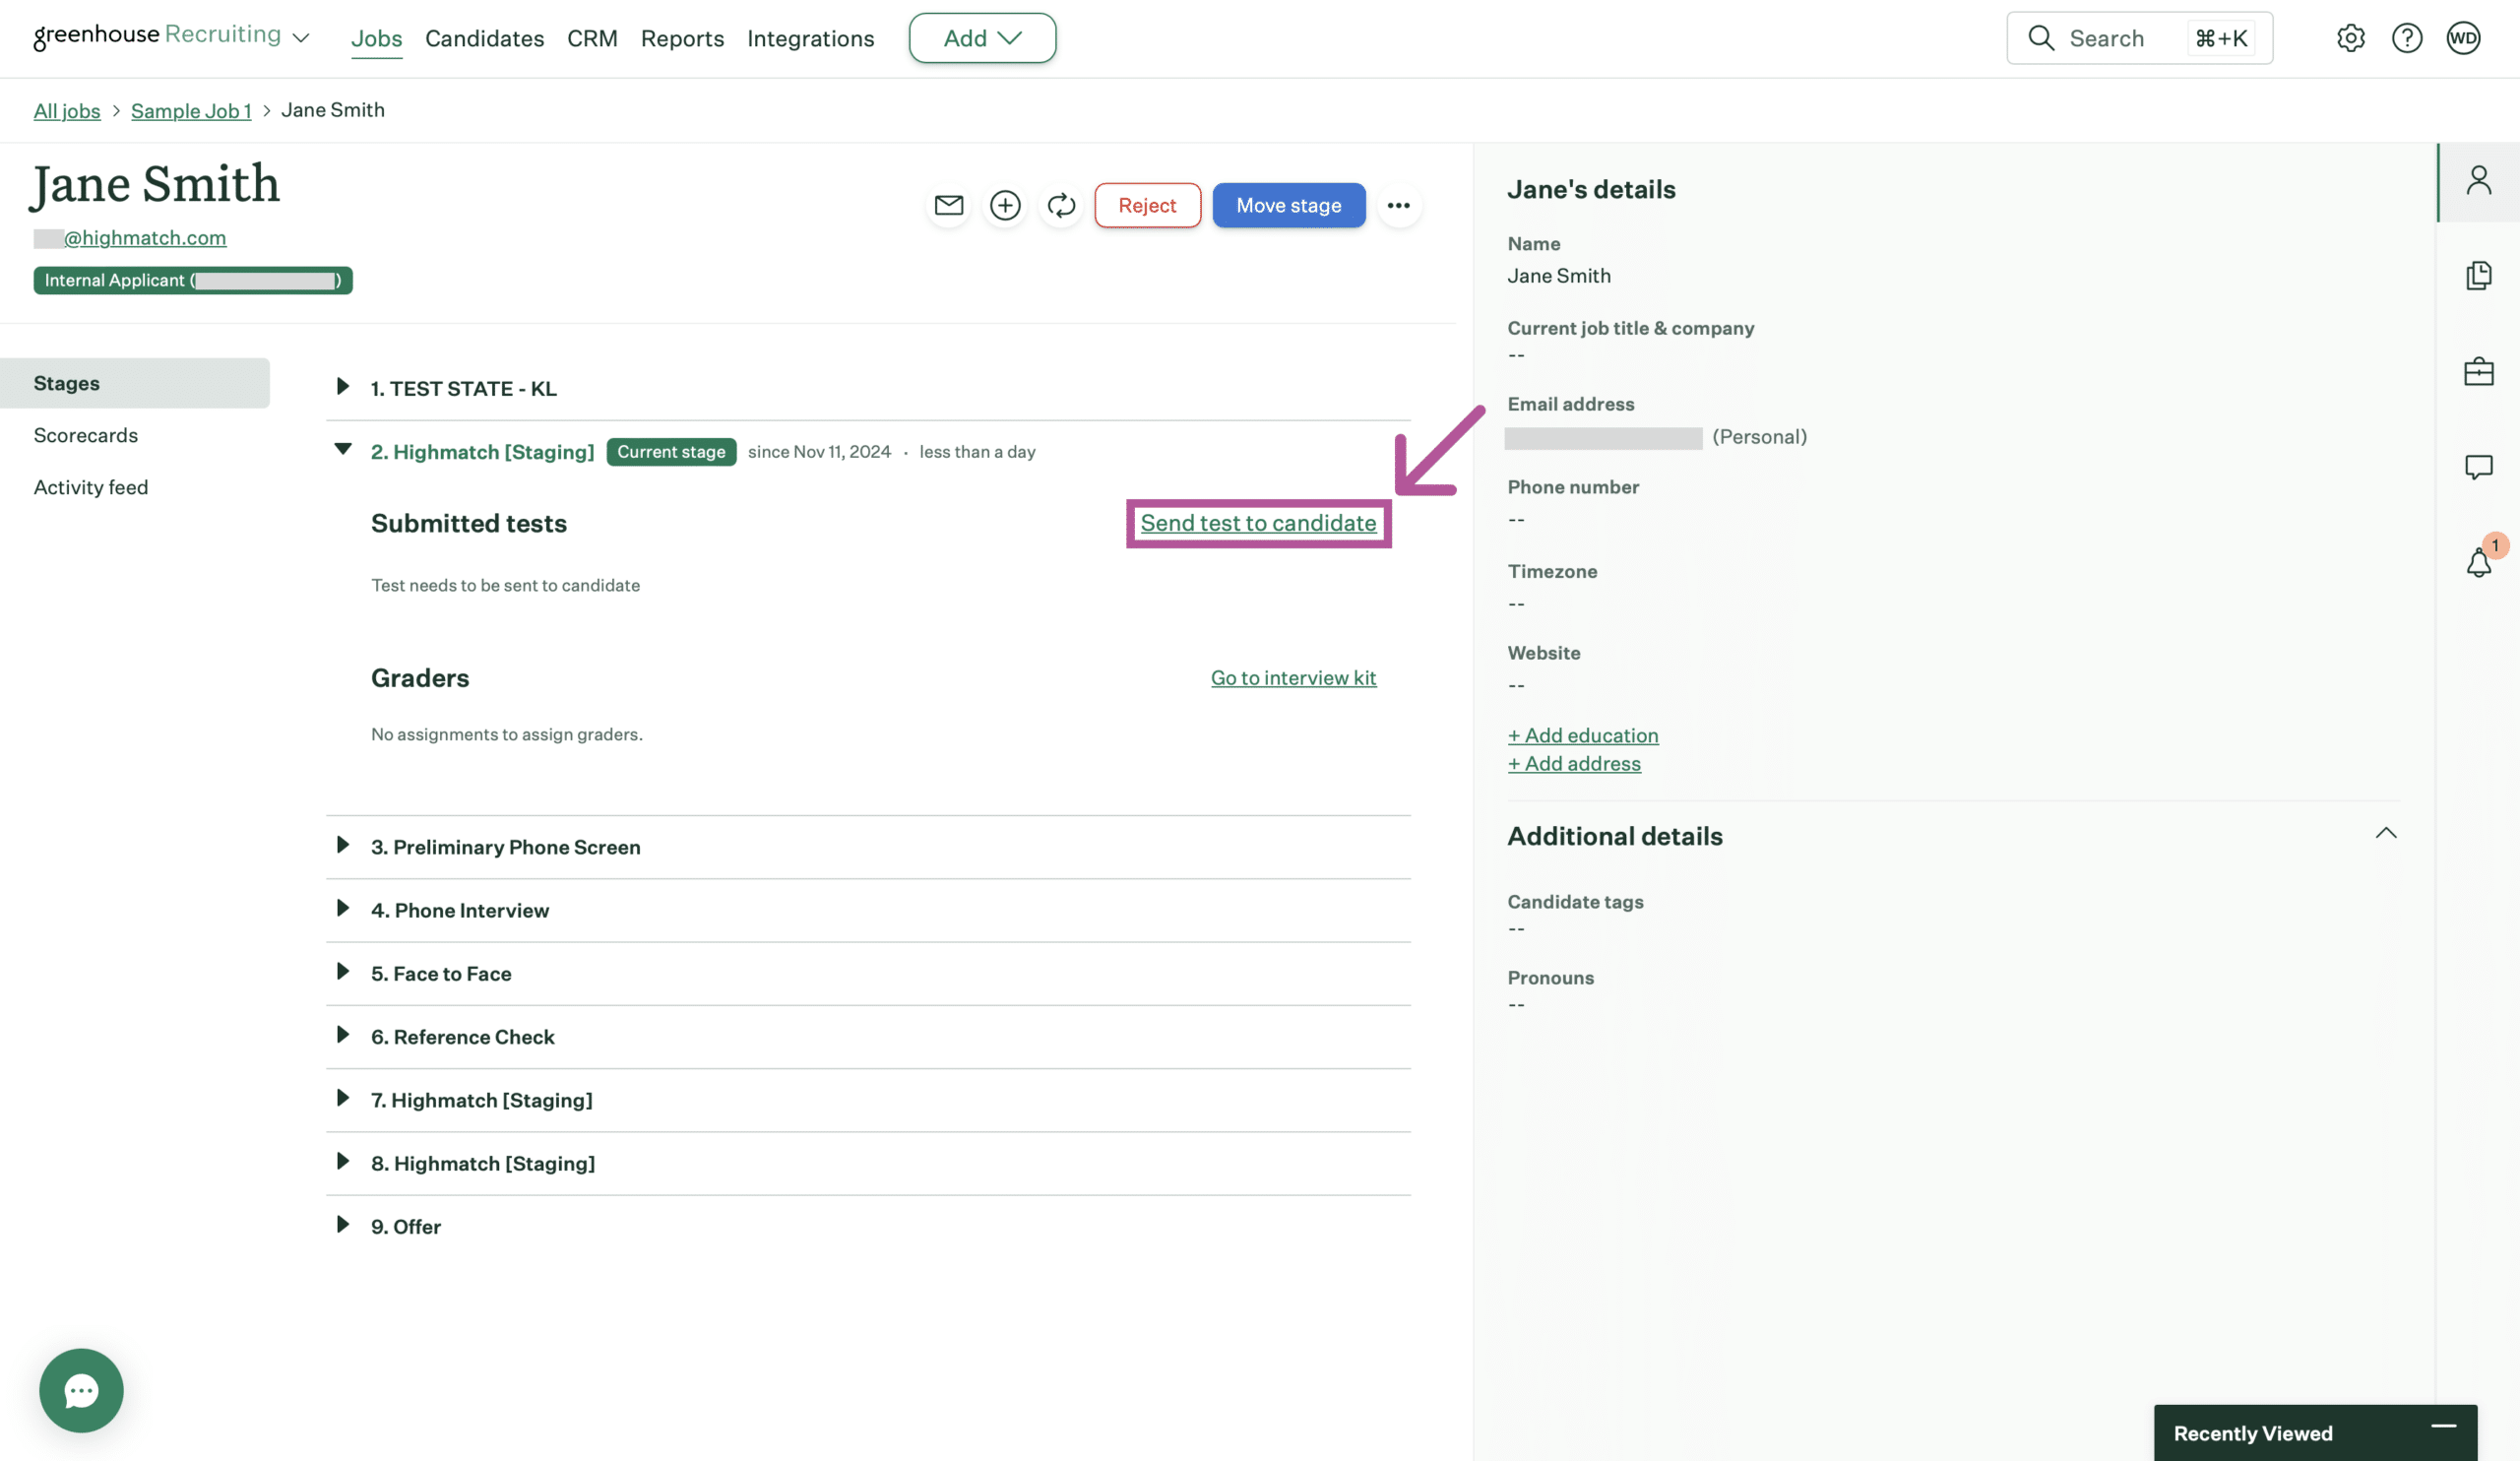
- Click the Send test to candidate button to manually send an assessment to a candidate.
- Ensure that:
- The candidate’s email address is inputted.
- The assessment you wish to use is selected (this will be pre-selected with the assessment selected in Step 6 , however, you may select any assessment assigned to your account).
- The assessment’s grader (User) is selected.
- When you’d like to send the assessment invite email (now or a future date).
- Click the Send Test button once finished.
- The candidate will receive an email inviting them to take the assessment.
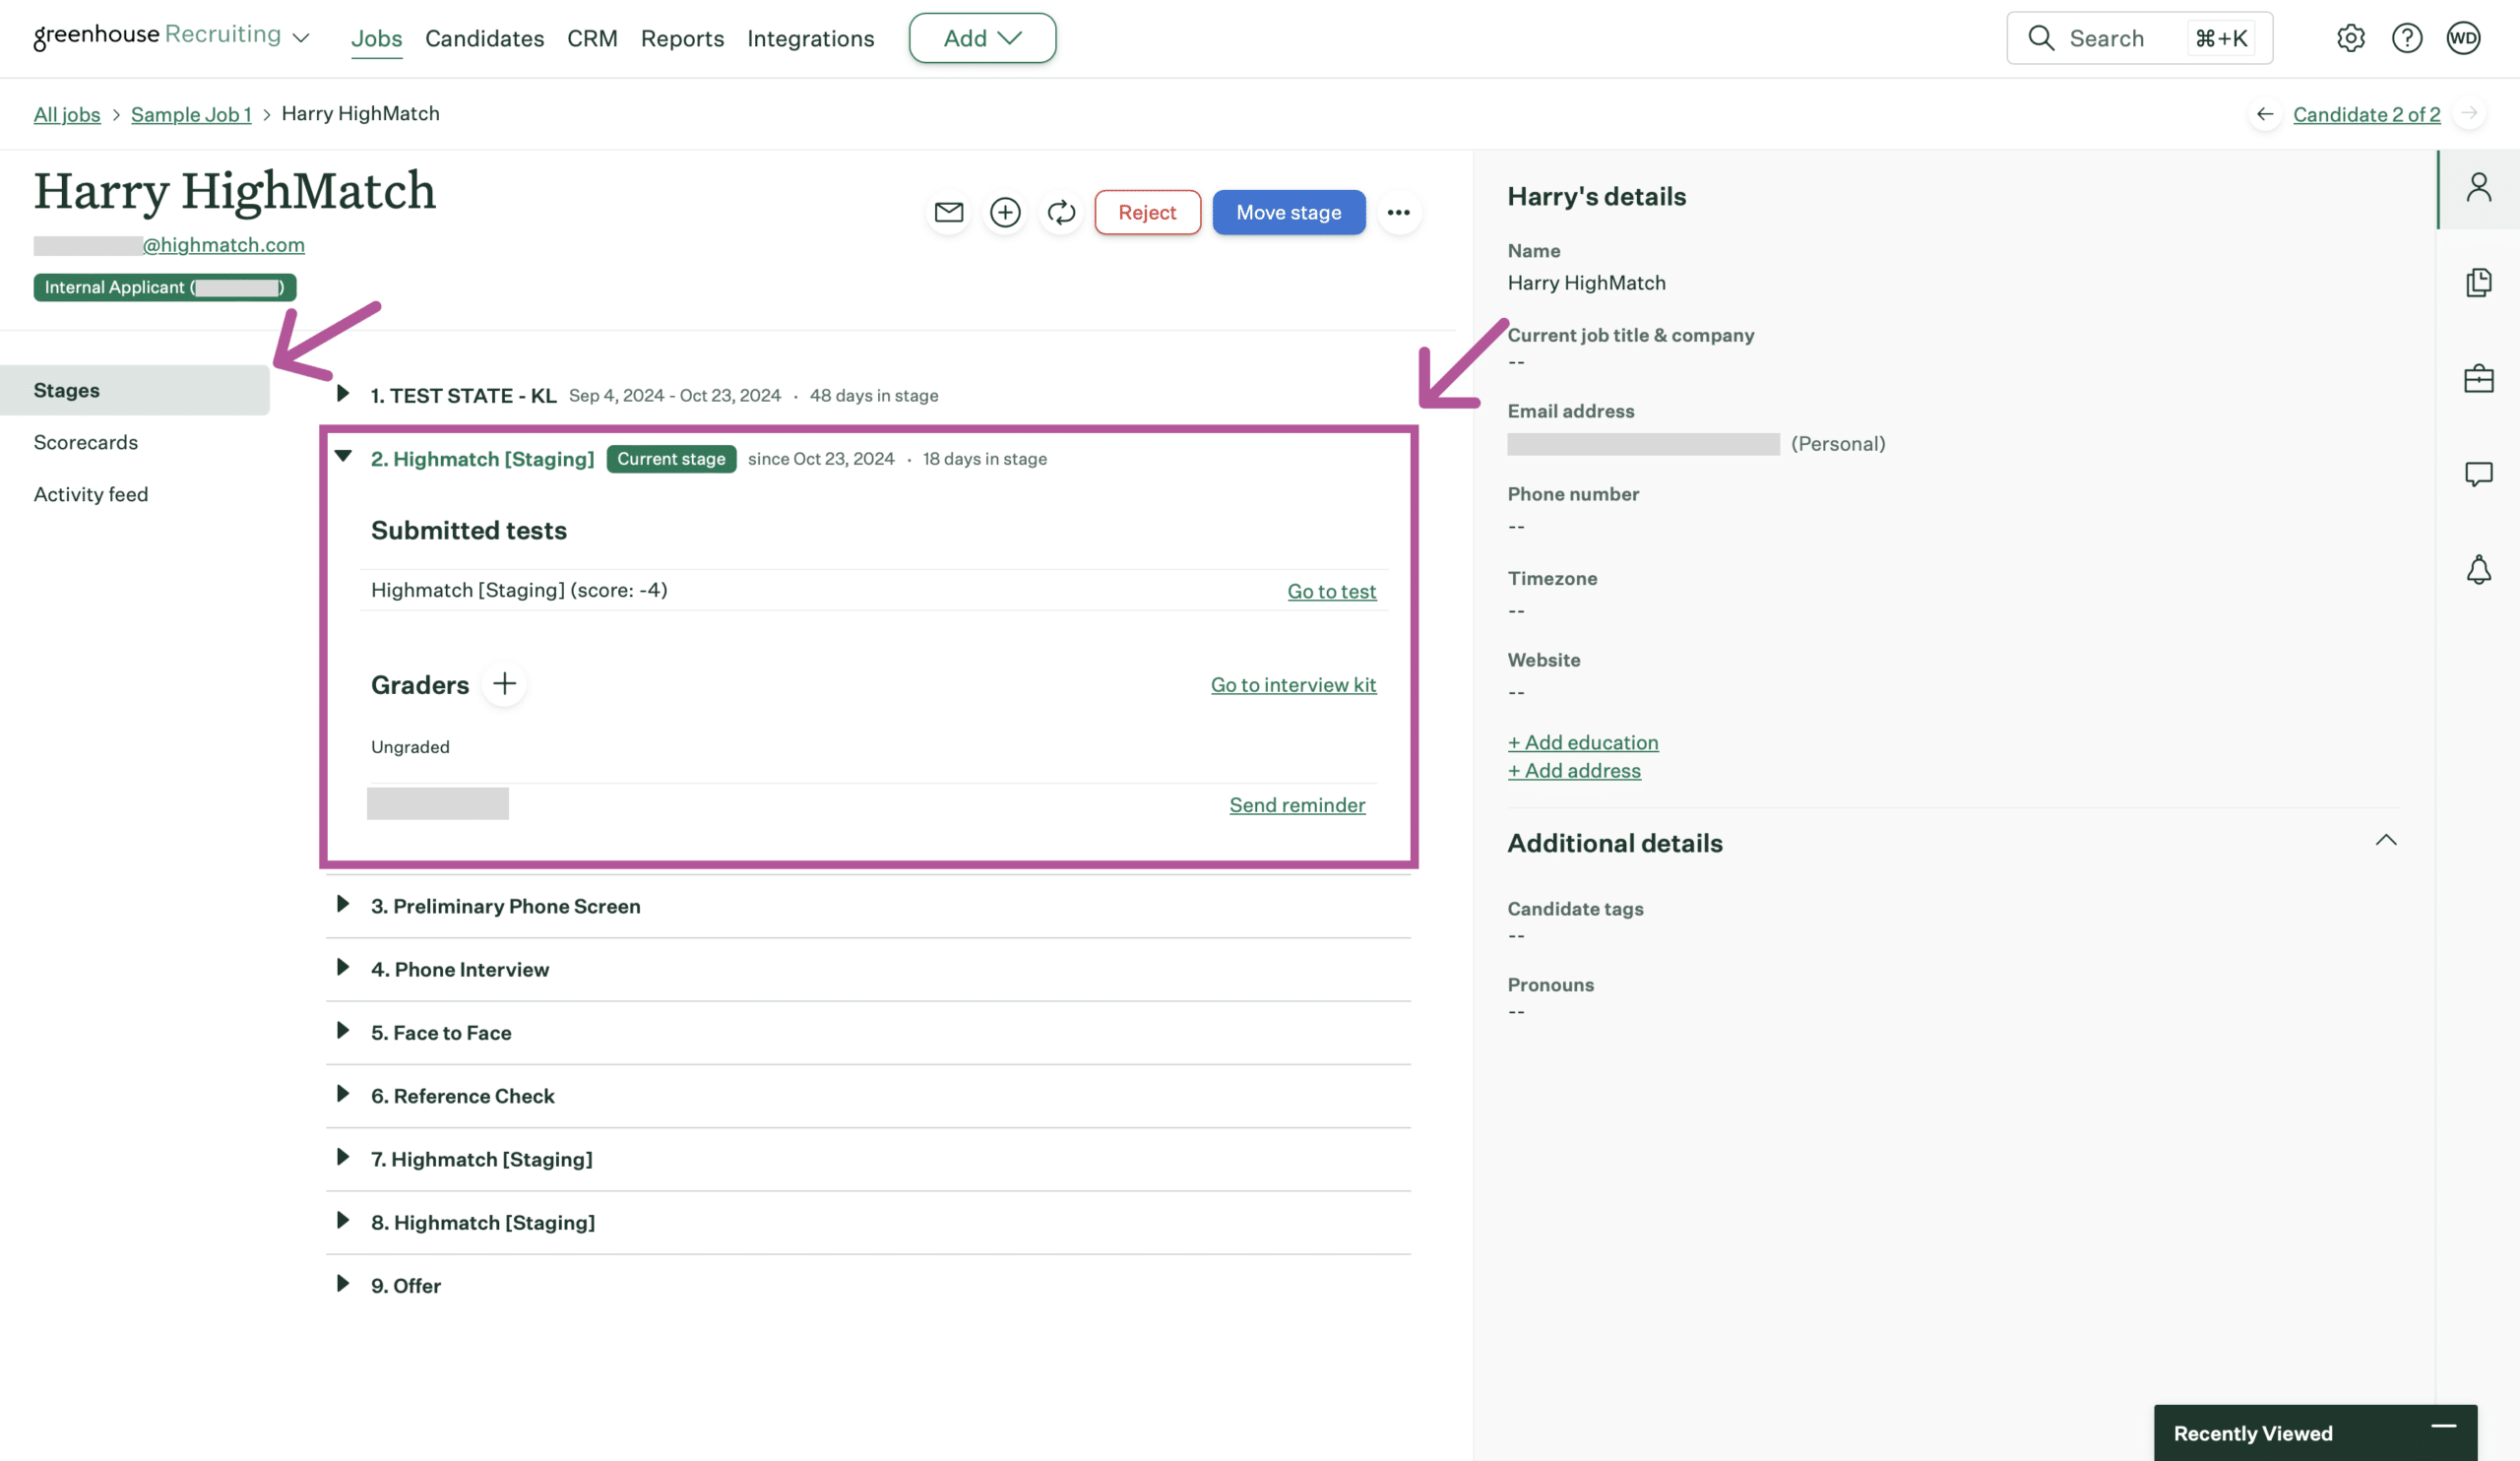
- This screen will also update to show if the candidate has taken the assessment or not.
- “Awaiting candidate’s submission” will be displayed if the candidate has not taken the assessment.
- The candidate’s score will be displayed if they have successfully taken the assessment.
- An error will display if the assessment request fails to be successfully sent to the candidate.
- If you are not able to determine the cause of the error, it is recommended that you log a support ticket with HighMatch. If there is an issue with the integration, contact Greenhouse directly for additional support.
Step 8: View the Candidate’s Assessment Report
Once the candidate has completed the assessment, you’ll be sent their assessment report. To view their assessment report:
- Select the test candidate that you identified in Step 2, and find the HighMatch stage.
- Click the Go to test button to view the candidate’s assessment report.
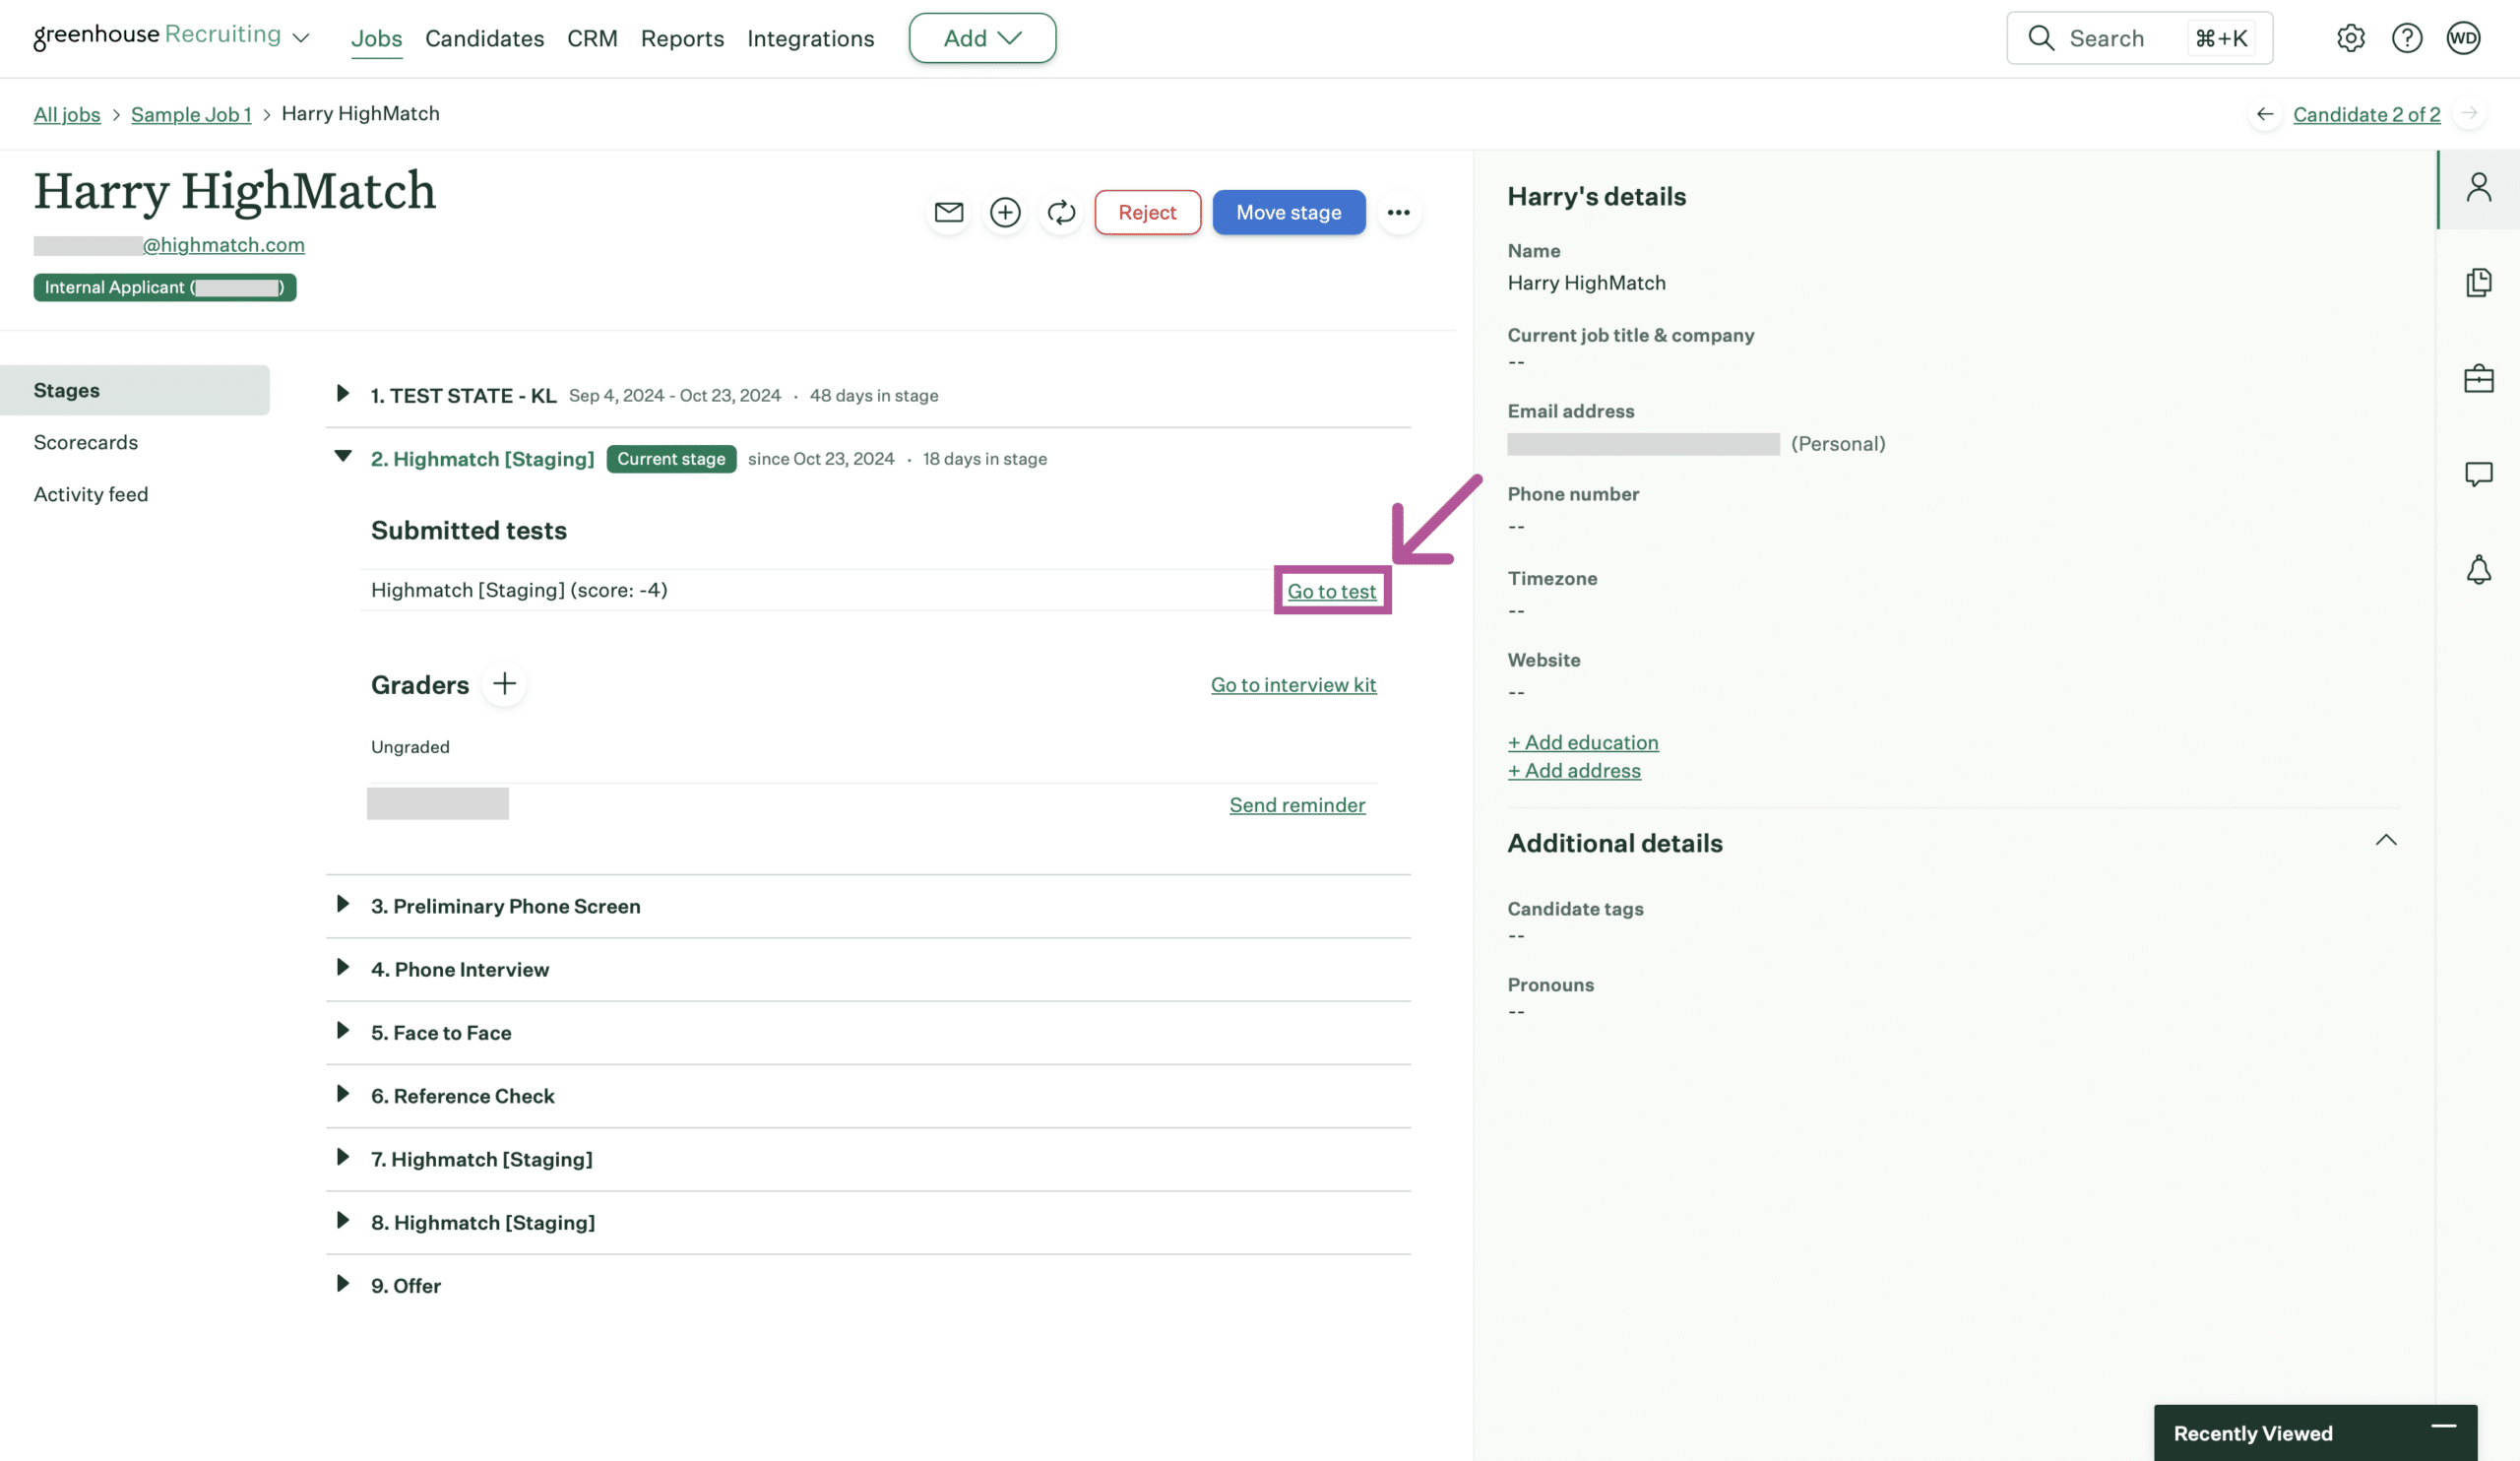
- Once you click the Go to test button, a new tab will open with the assessment report. Here you can view HighMatch’s detailed explanation of the assessment’s results.
Your integration is set up and ready to use! Please reach out to HighMatch’s Success team at support@highmatch.com if you have any questions or feedback regarding the HighMatch integration, assessments and assessment reports.